The Budget workspace answers three questions that get harder to keep in your head as the day approaches: what is this all going to cost, what have we already paid, and who still needs paying, how much and by when. It is private to you and your co-organisers; nothing in it appears on your page.
Set a target and a currency
Open Budget in the studio rail and press the gear button in the toolbar for Target & currency. The target is the total you are aiming for; leave it blank if you would rather just track what you spend. The currency is how amounts are shown. Changing it does not convert anything you have already entered, so pick it once at the start. Both are saved to the event, so your co-organisers see the same figures.
Add what you are paying for
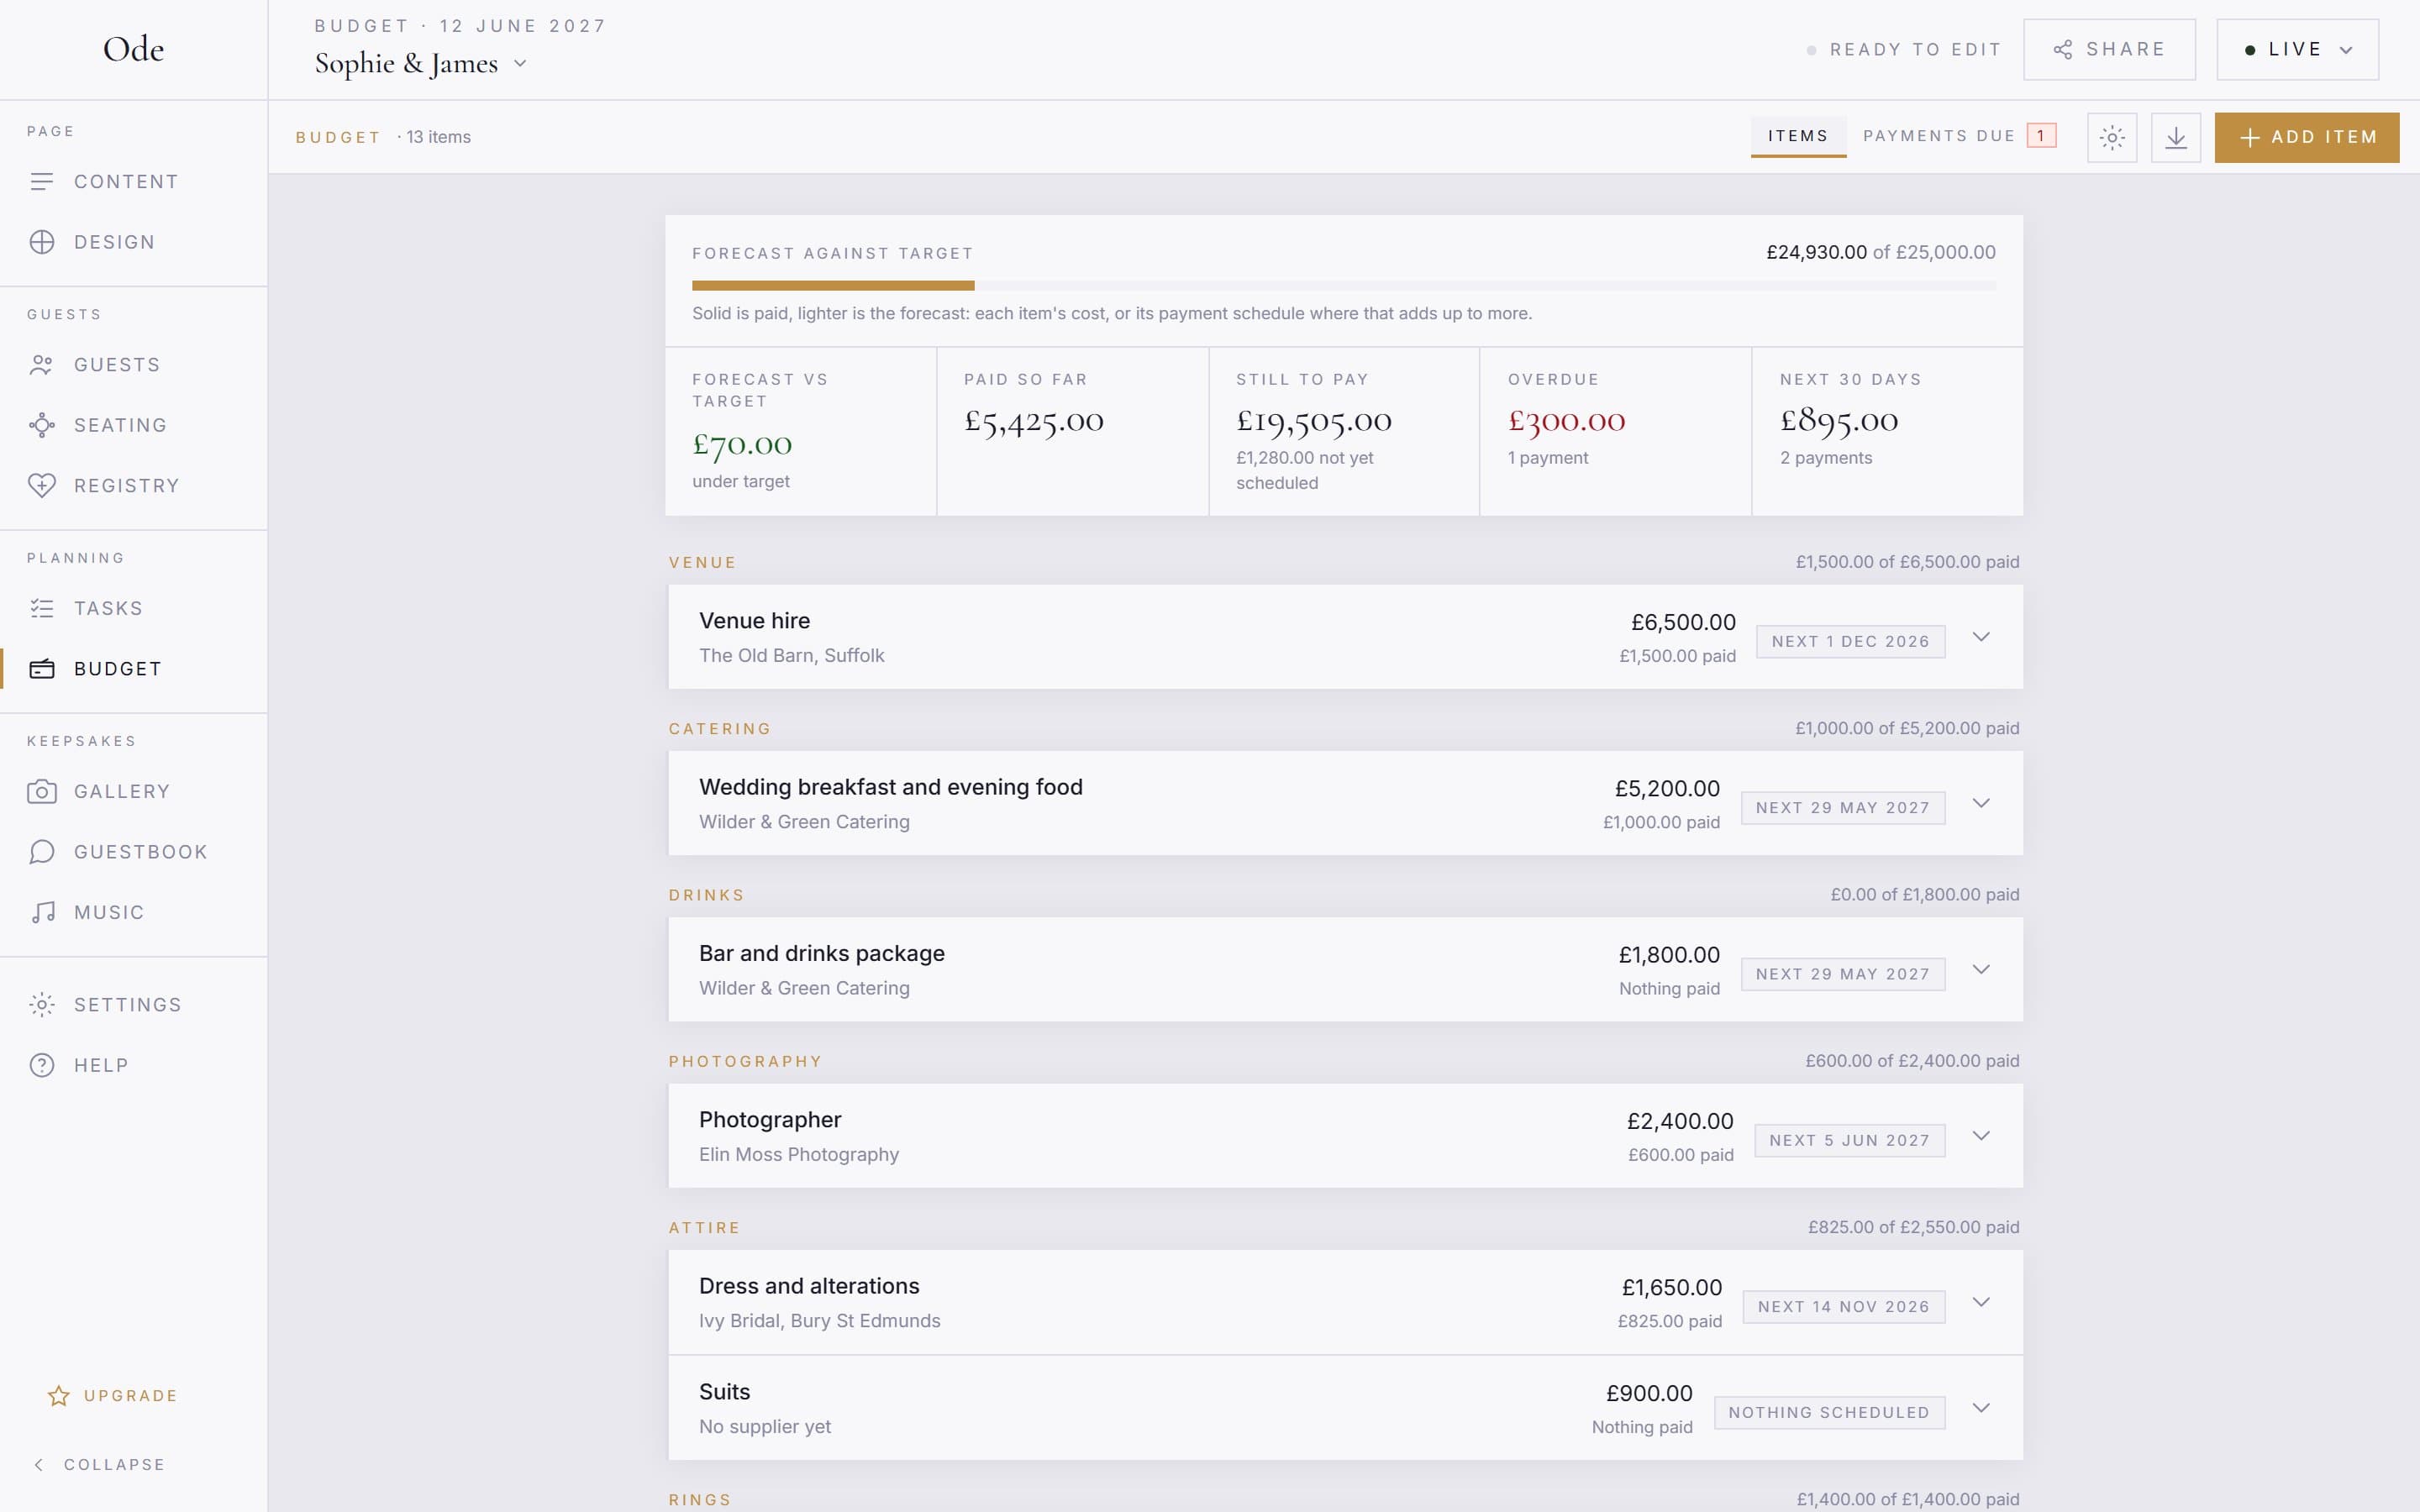
Press Add item for each thing with a cost: the venue, the caterer, the photographer, the rings. Give it a Cost: a rough figure while you are still shopping around, updated to the real one once a quote is accepted. Pick a Category from the list; anything that doesn’t fit goes under Other, with the item name saying what it is. Add the supplier’s name, email and phone so their details are one tap away when you need to chase something, and use Notes for what the price includes, contract terms or reference numbers.
Items are grouped by category in a fixed order, with Other last. To move an item, open it and change the Category dropdown at the top; it saves straight away.
Schedule the payments
Open an item and press Add payment for each instalment the supplier has asked for: typically a Deposit on booking, sometimes an Instalment or two, and the Balance a few weeks before the day. Give each one an amount and a Due date. If you have already paid it, fill in Paid on as well.
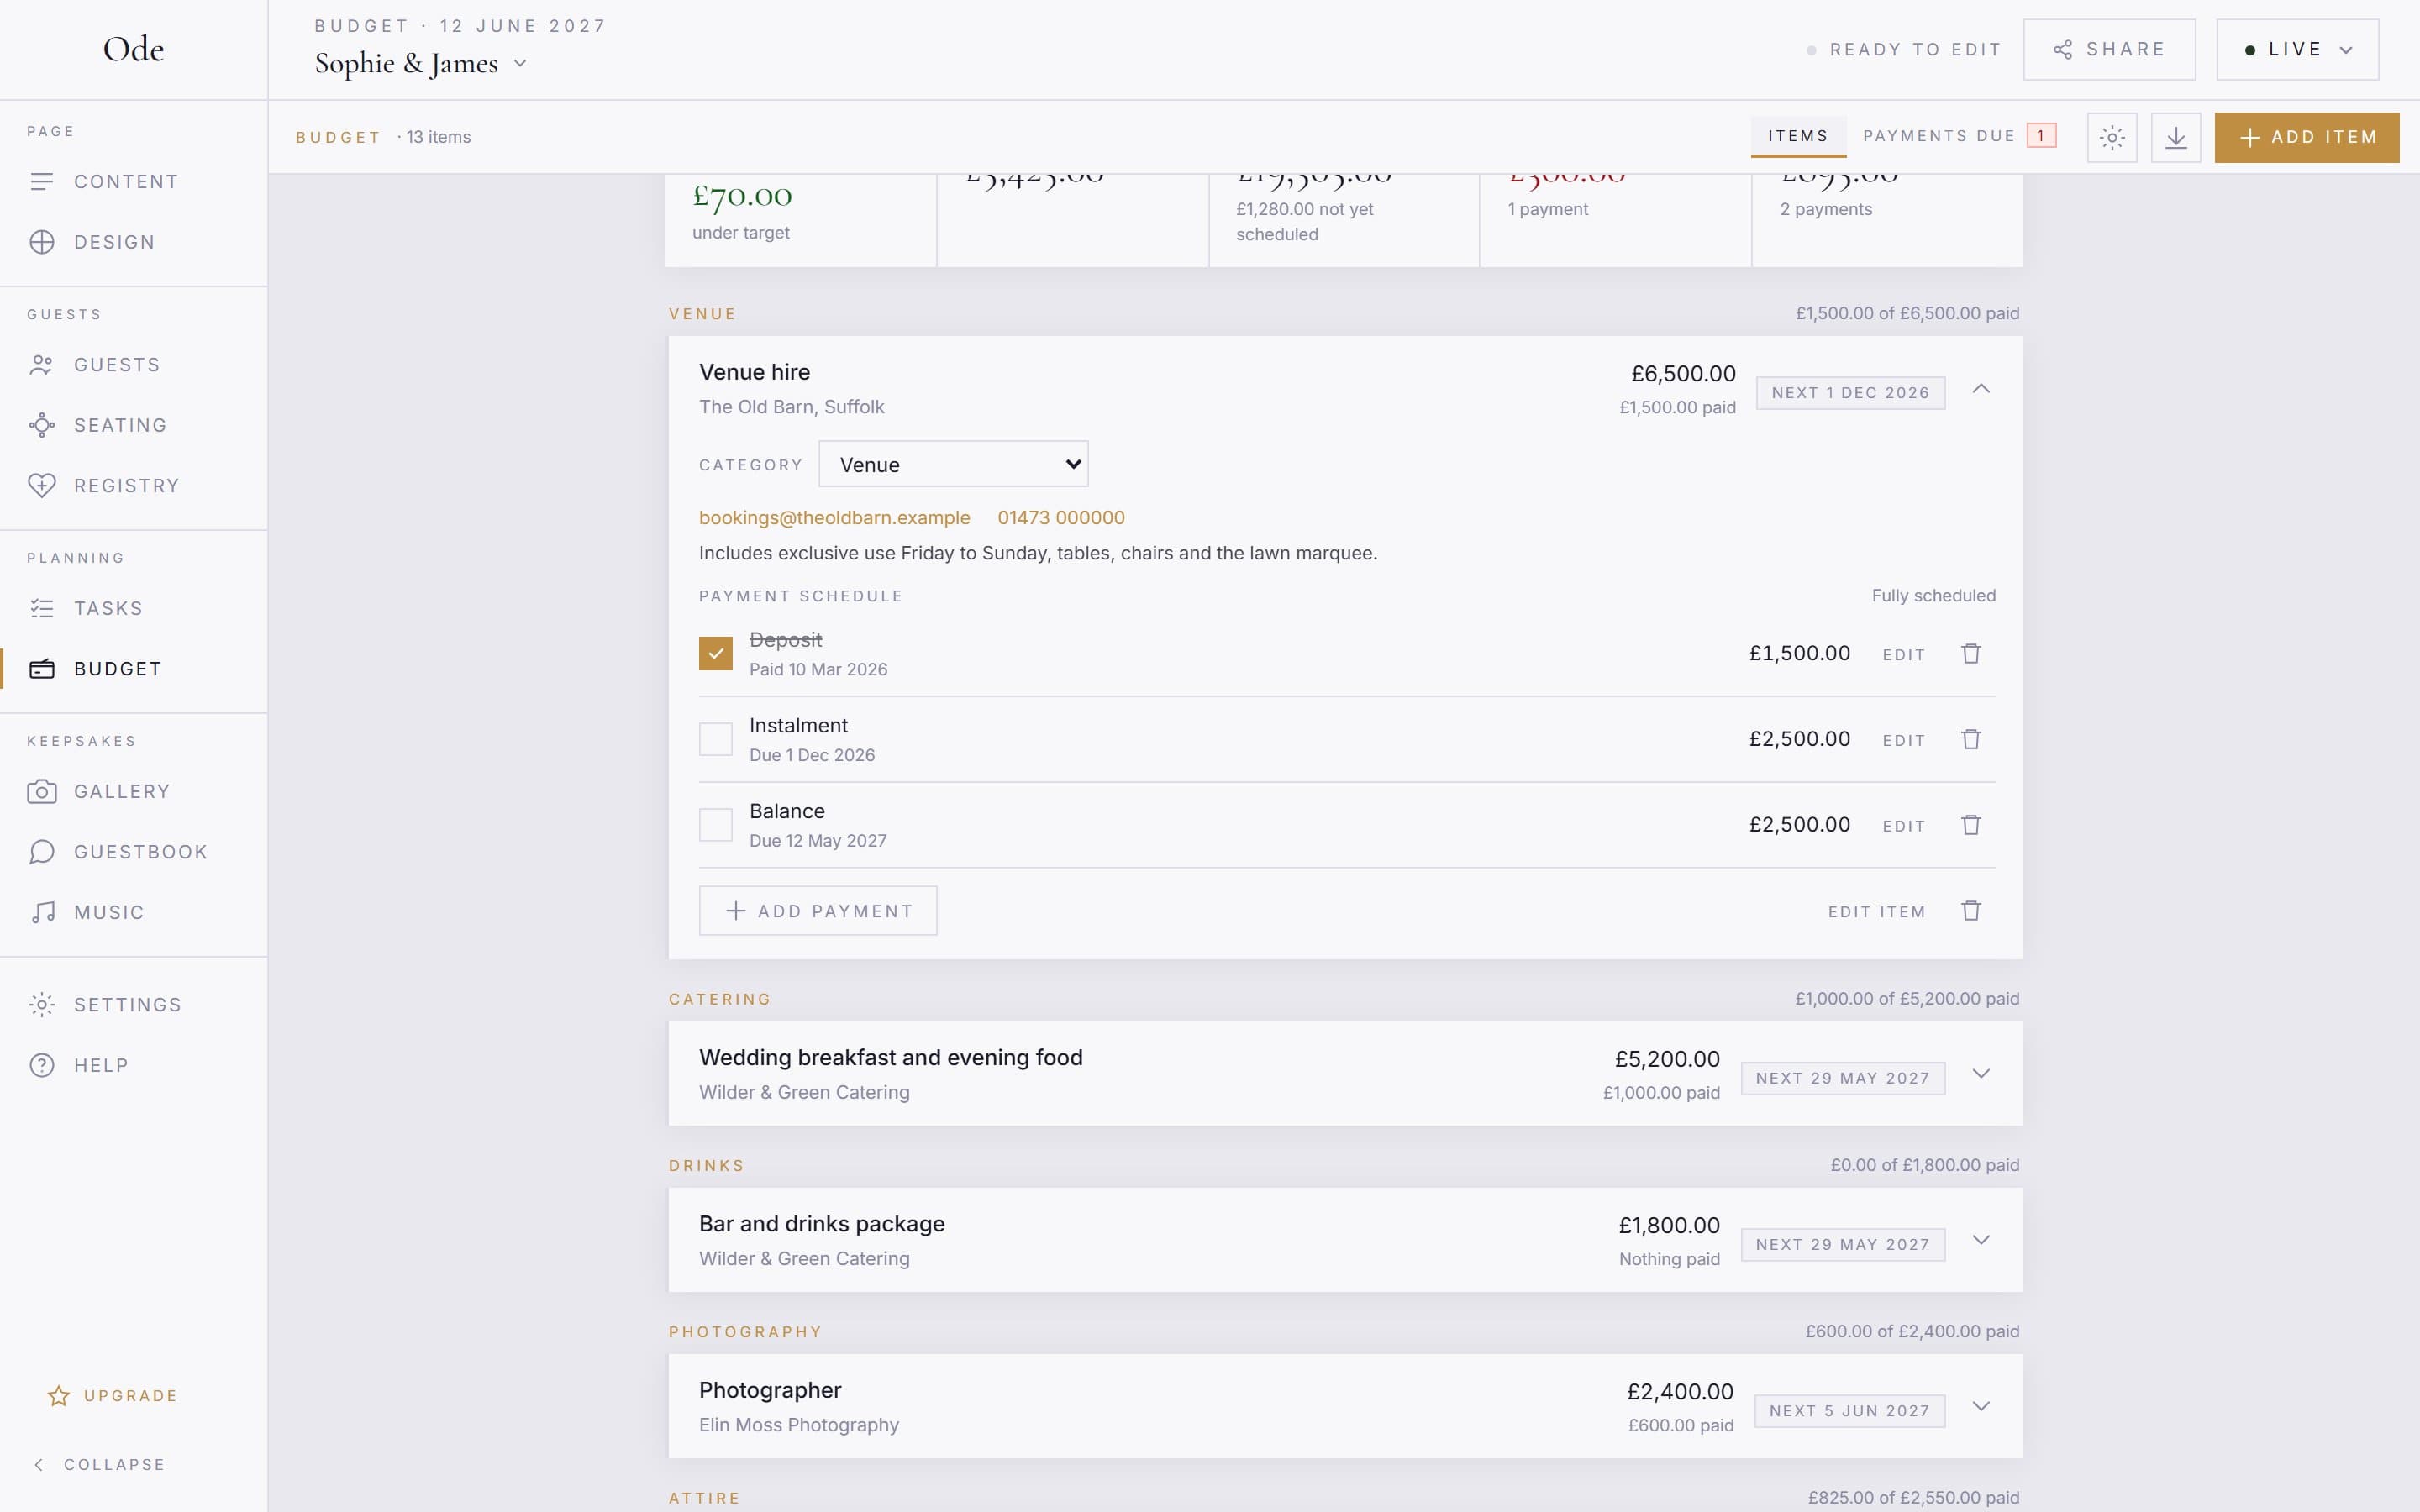
Under the amount, the form shows how much of the item’s cost is not yet scheduled, with Use it to fill that in; typing Balance as the label does the same automatically. If a payment takes the schedule past the cost, the form says by how much and the item shows an amber “over cost” chip. It is a warning, not a block: a price rise is real, and the forecast follows the schedule.
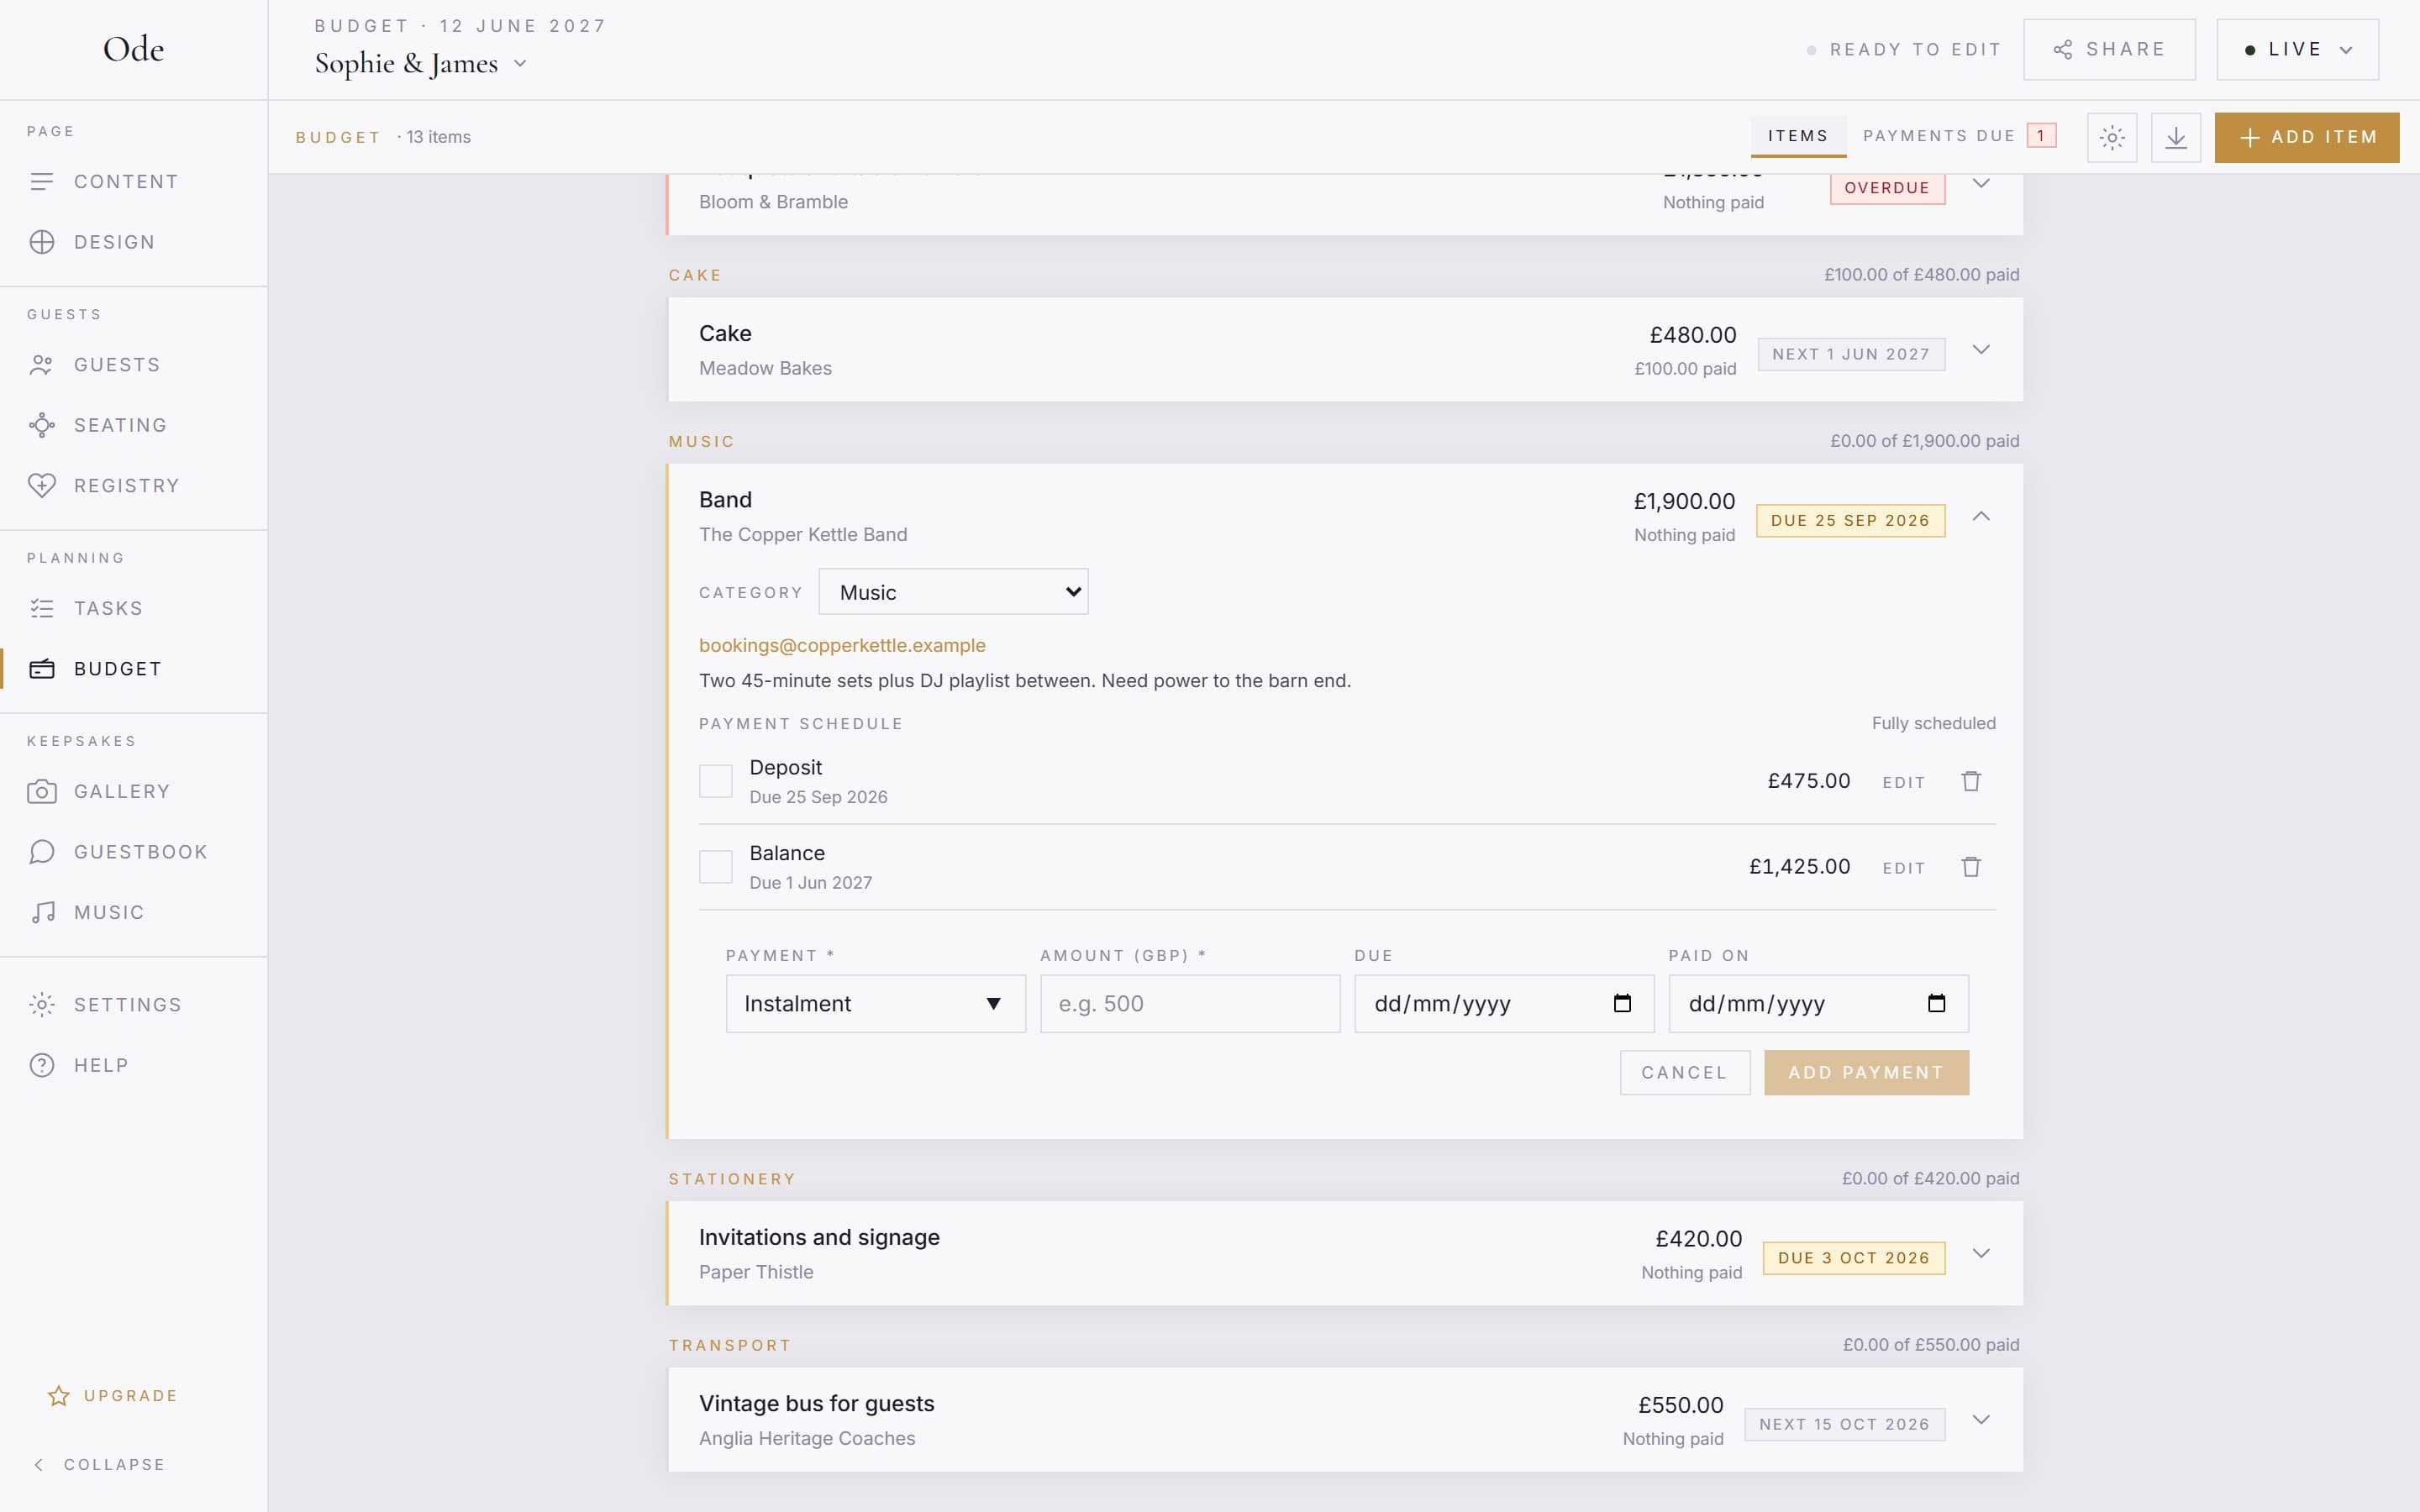
Each item then shows a status: Overdue when a payment’s due date has passed and it is not ticked, Due with the date when something falls within the next 30 days, Next with the date for anything later, Paid once every payment is ticked, and Nothing scheduled until you add the first payment.
Tick payments off
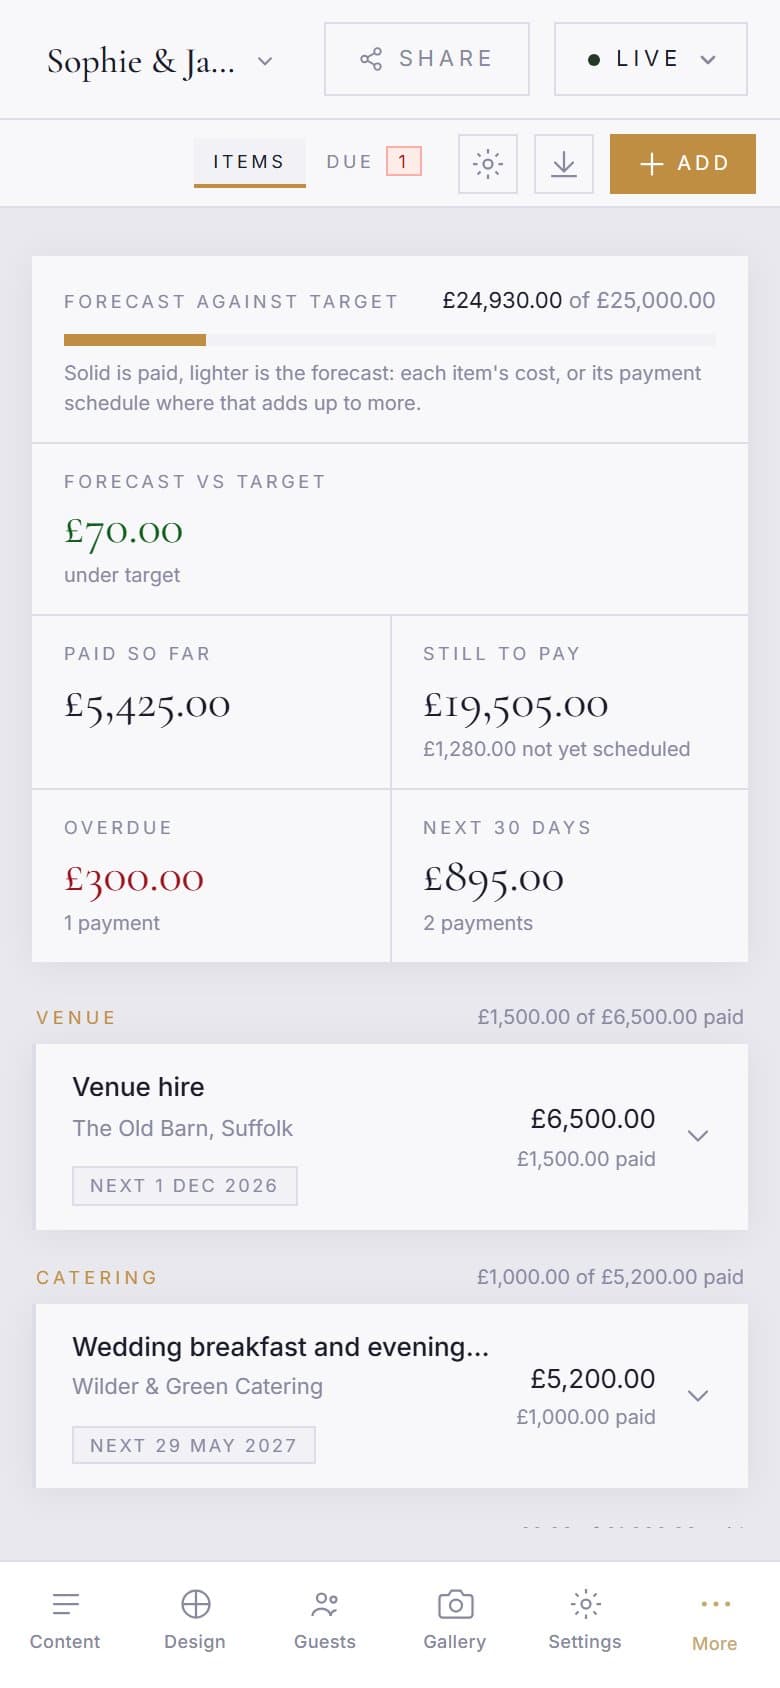
When you pay a supplier, tick the box next to that payment. It is marked paid on today’s date; press Edit on the payment if it was actually paid on another day. Untick it if you got it wrong. The summary at the top updates as you go: how much is paid so far, how much is still to pay, anything overdue and what is coming up in the next 30 days.
The first tile, Forecast vs target, is the one to watch. The forecast is every item’s cost; where the payments you have scheduled for an item add up to more than that, the schedule wins, so the forecast only ever moves towards what you will really pay. Against a target it shows how far under or over you are, in red when over.
See everything that is due
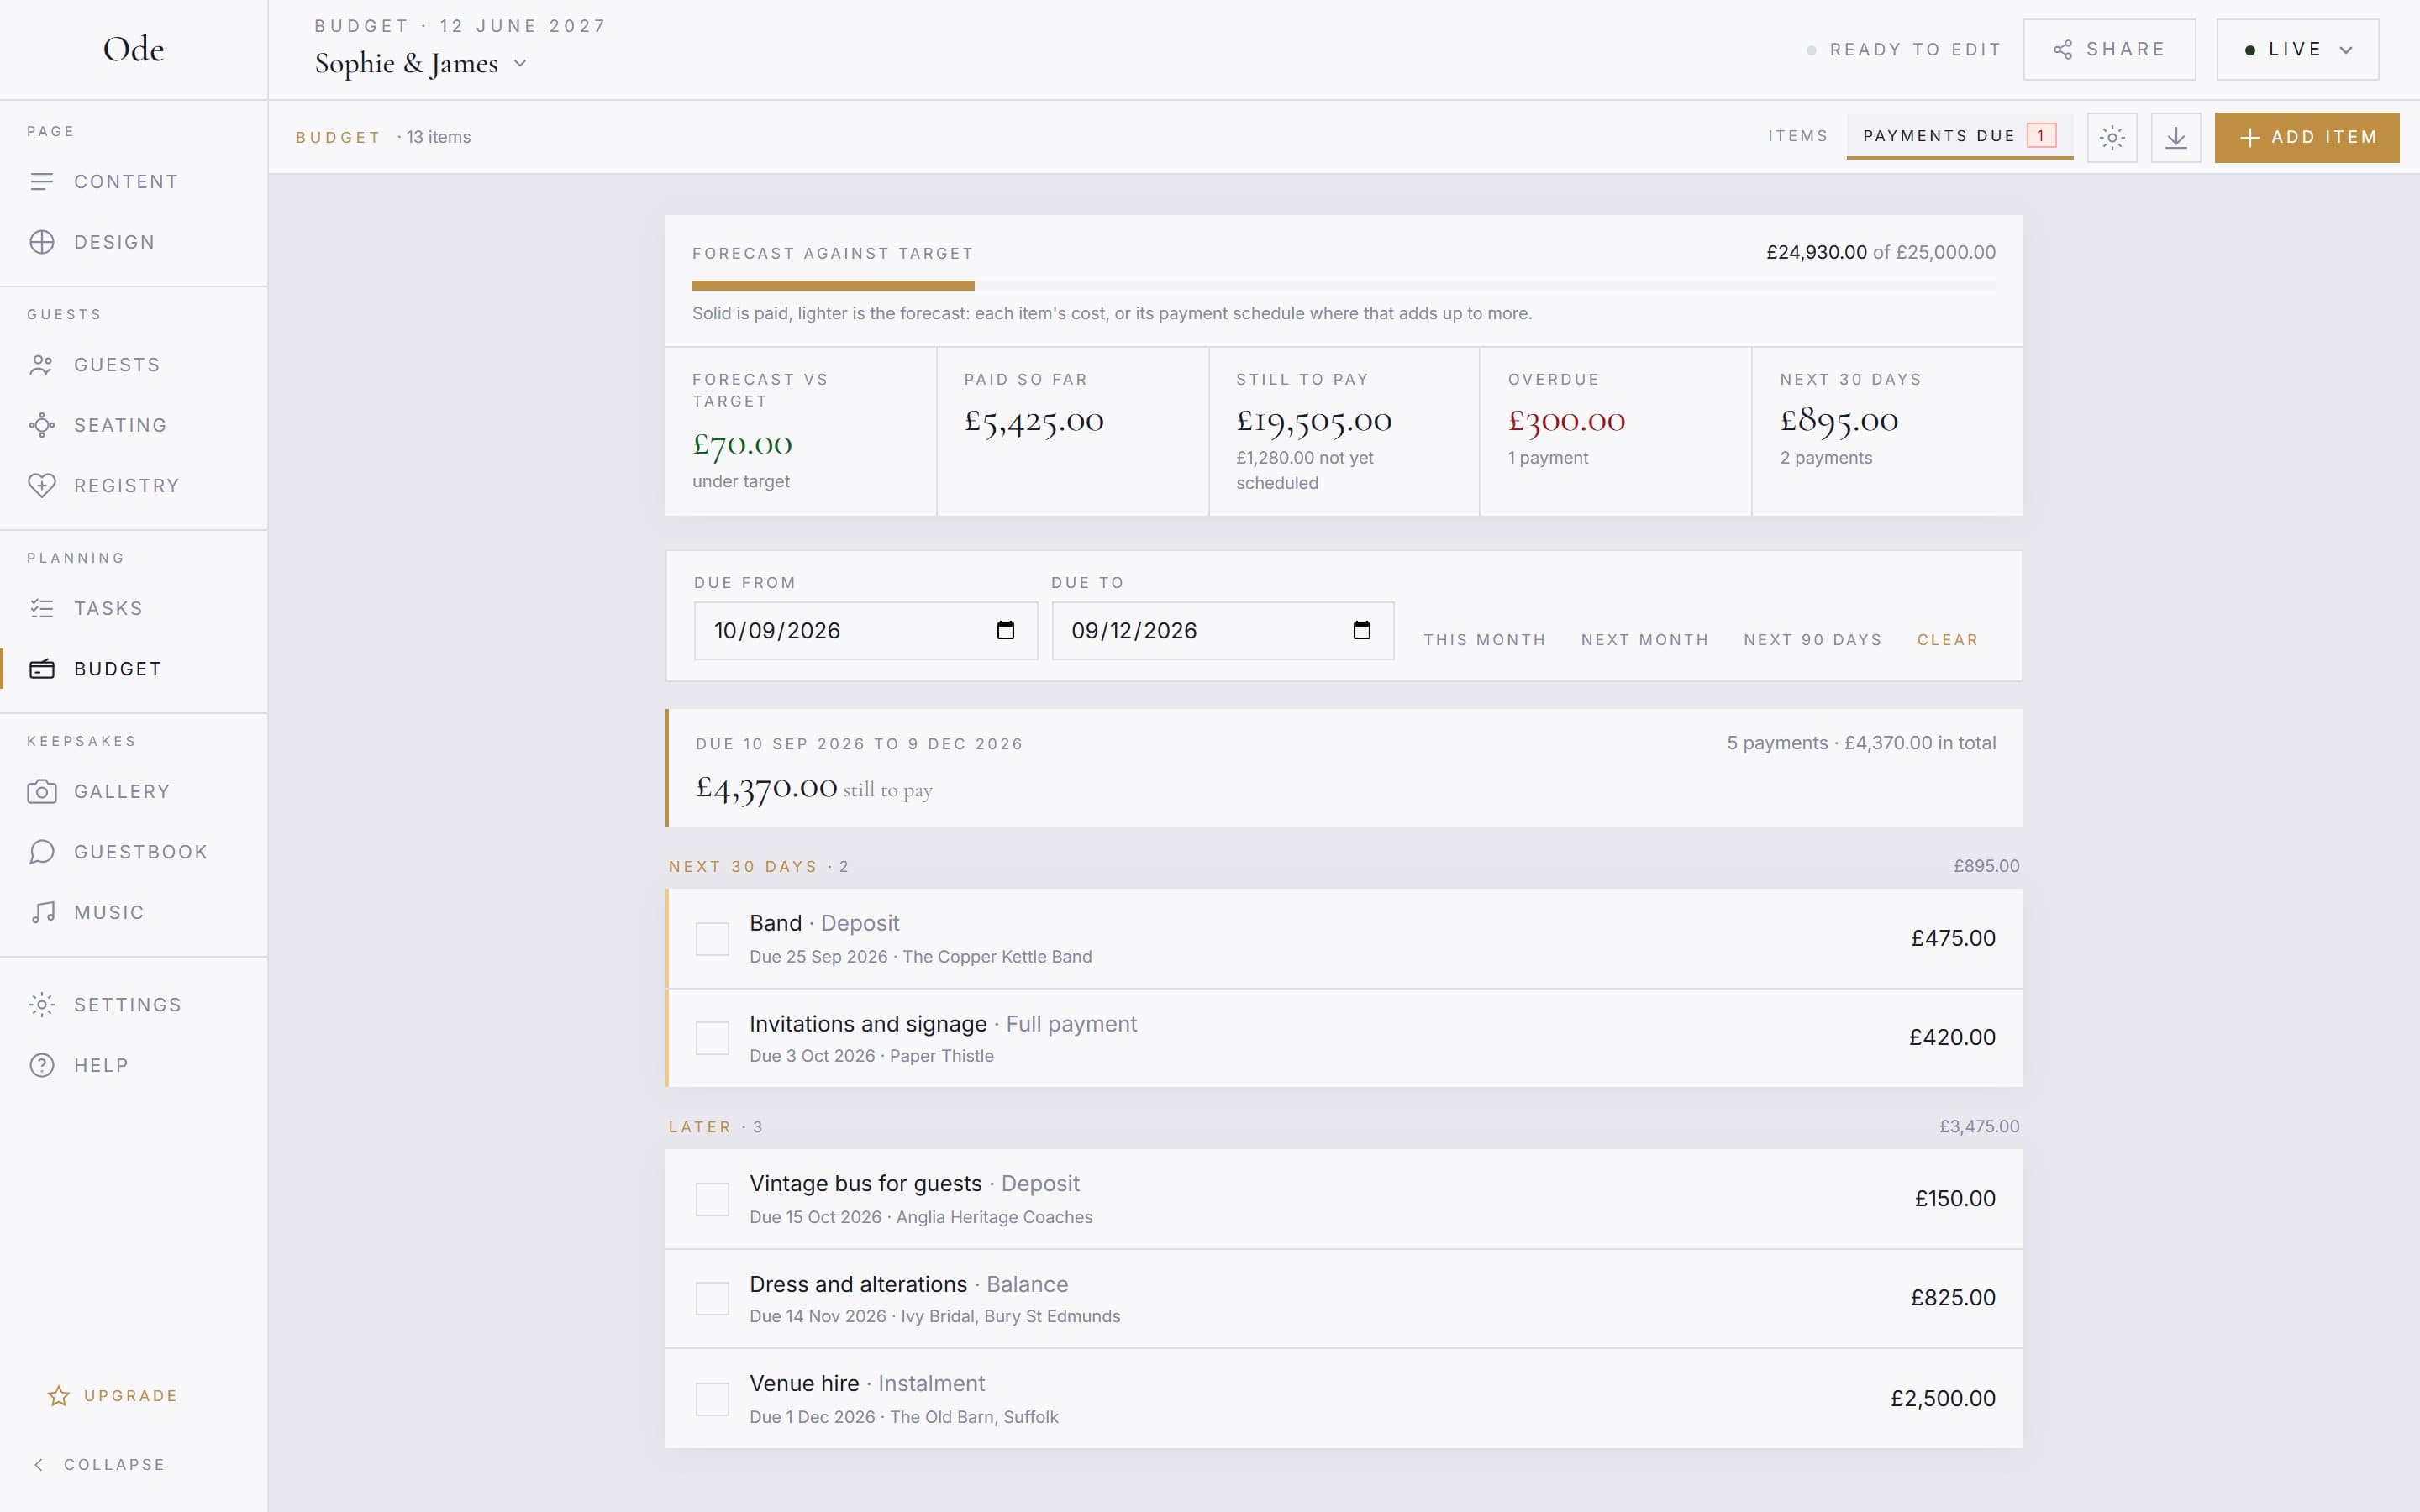
Switch from Items to Payments due in the toolbar for one list of every payment across the whole budget, most urgent first: overdue, then the next 30 days, then later, then anything without a date, and finally what is paid. A red count on the tab tells you at a glance if something has slipped. You can tick payments off from this view too.
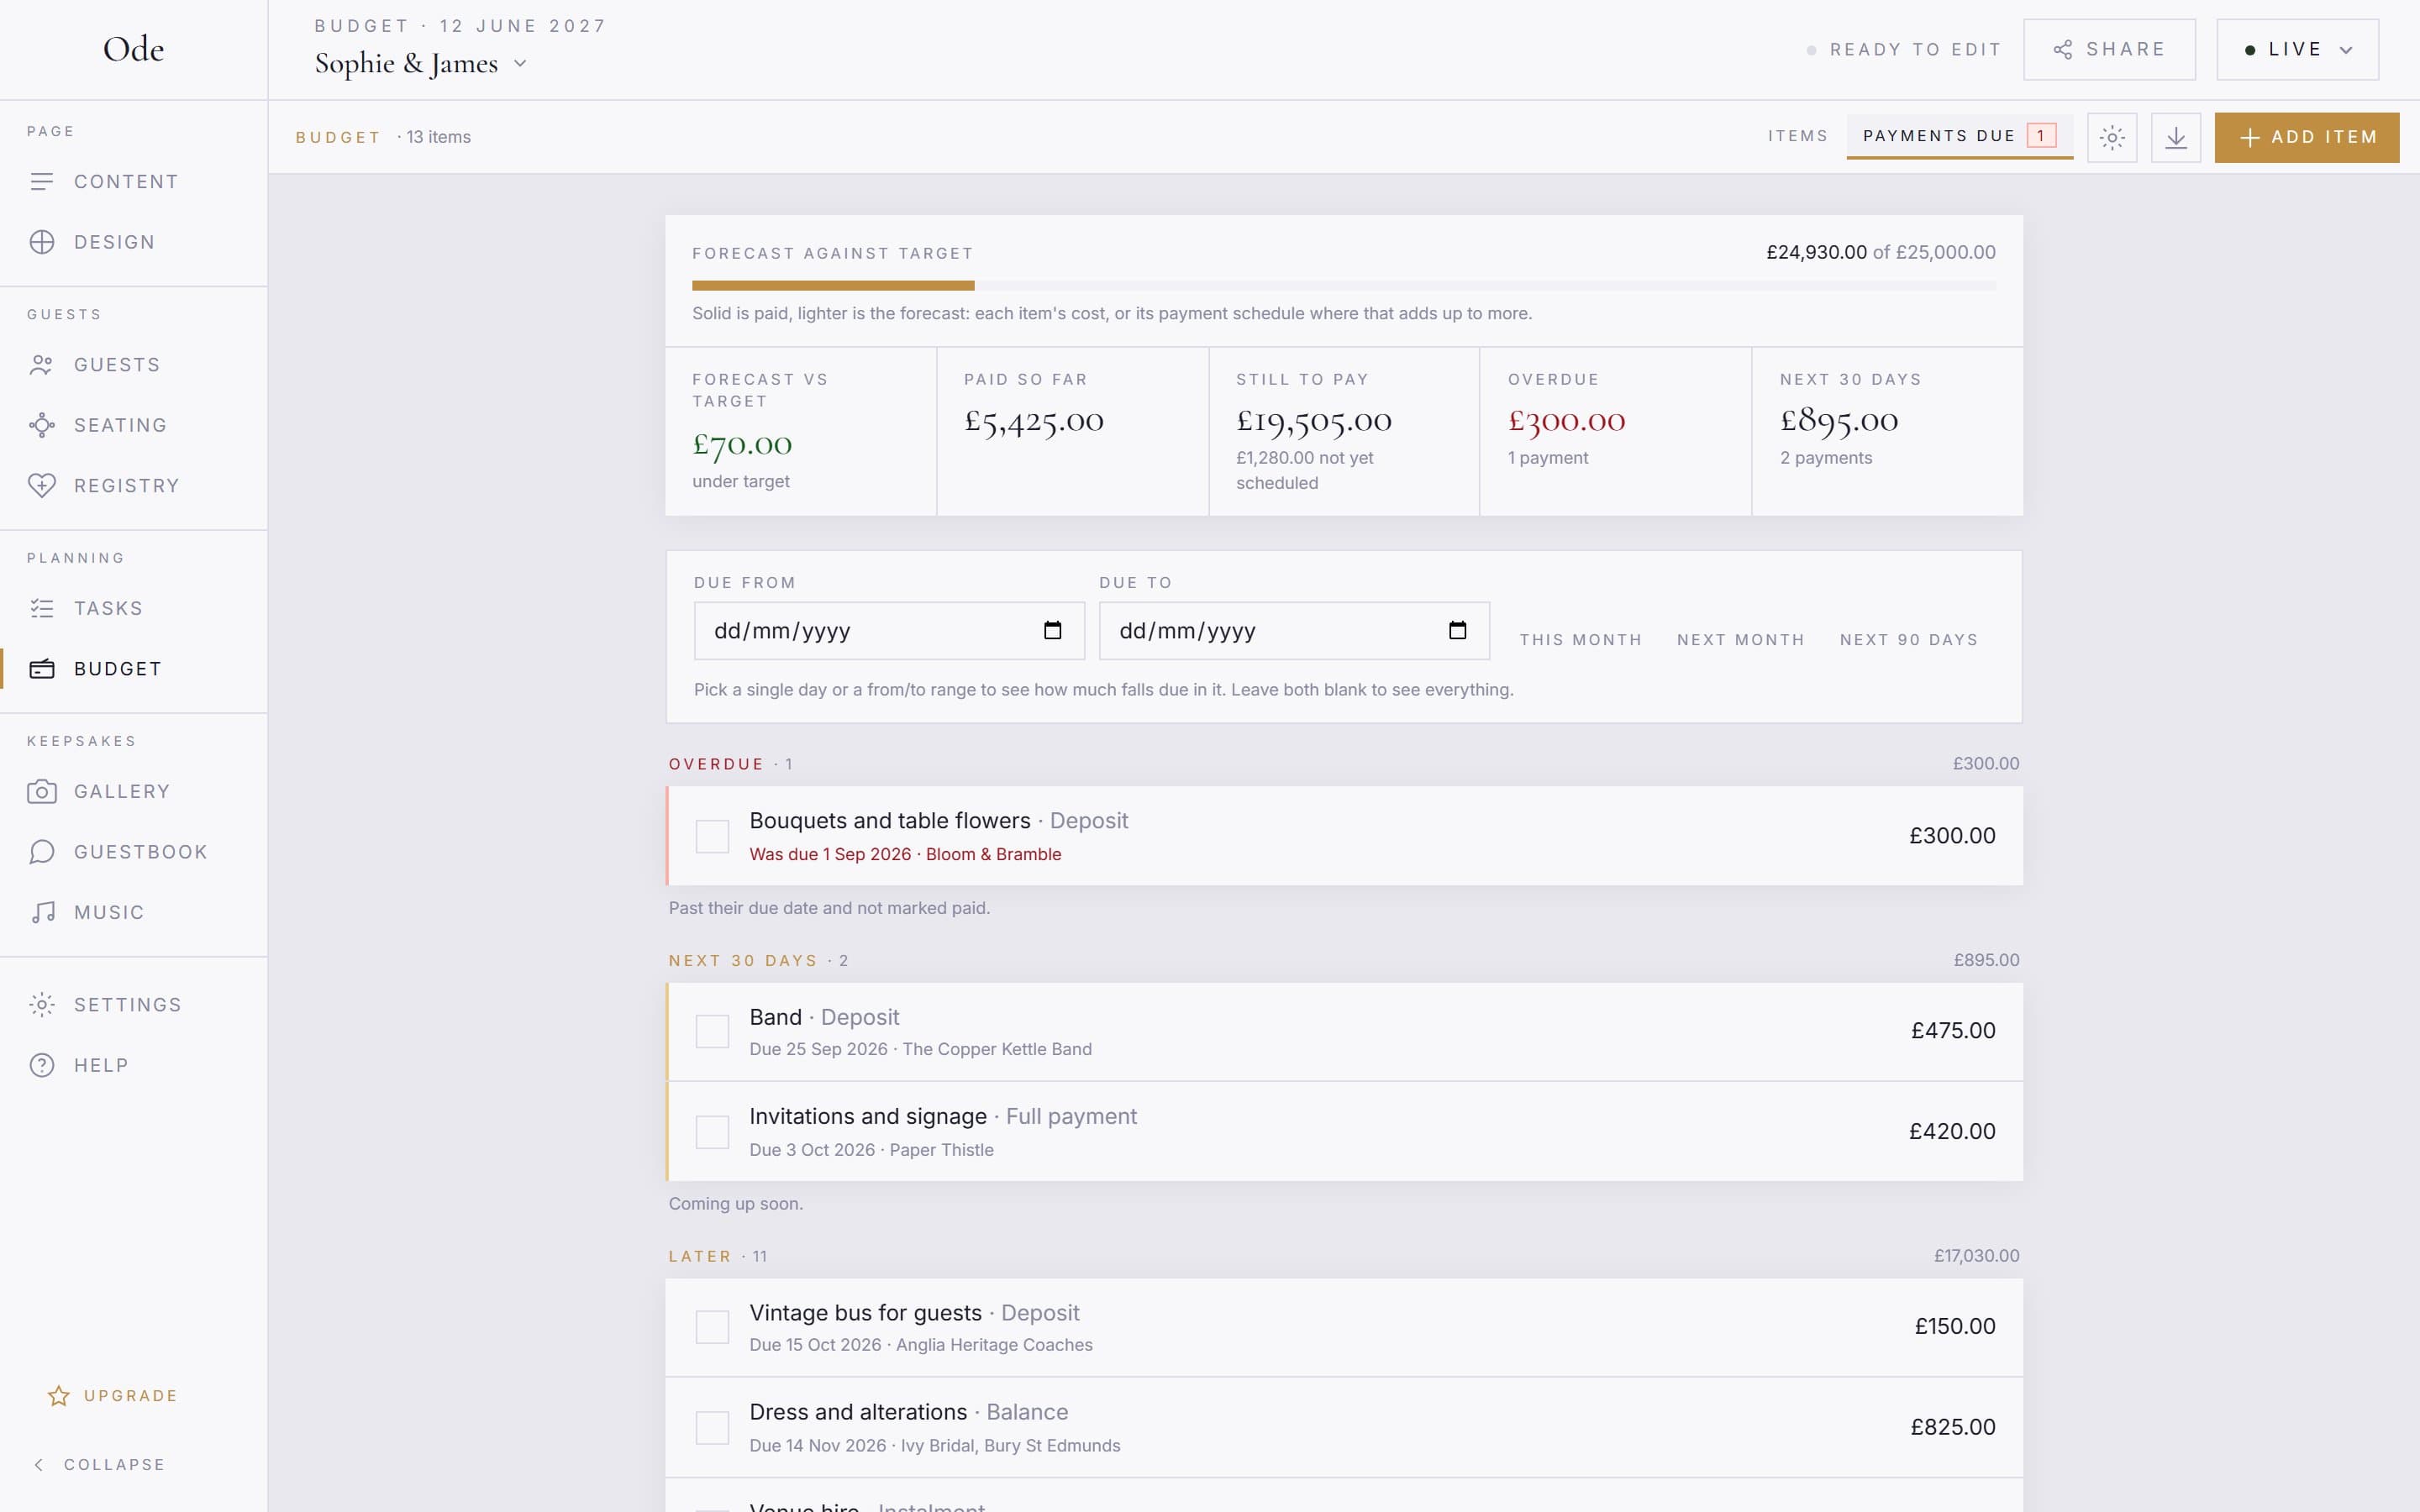
To see what falls due in a particular window, use Due from and Due to at the top of the list, or one of the presets: This month, Next month or Next 90 days. Fill in just one date to look at a single day. The list narrows to that window and a line above it totals what is still to pay, alongside anything in the window you have already paid. Clear brings everything back.
Download the budget as a PDF
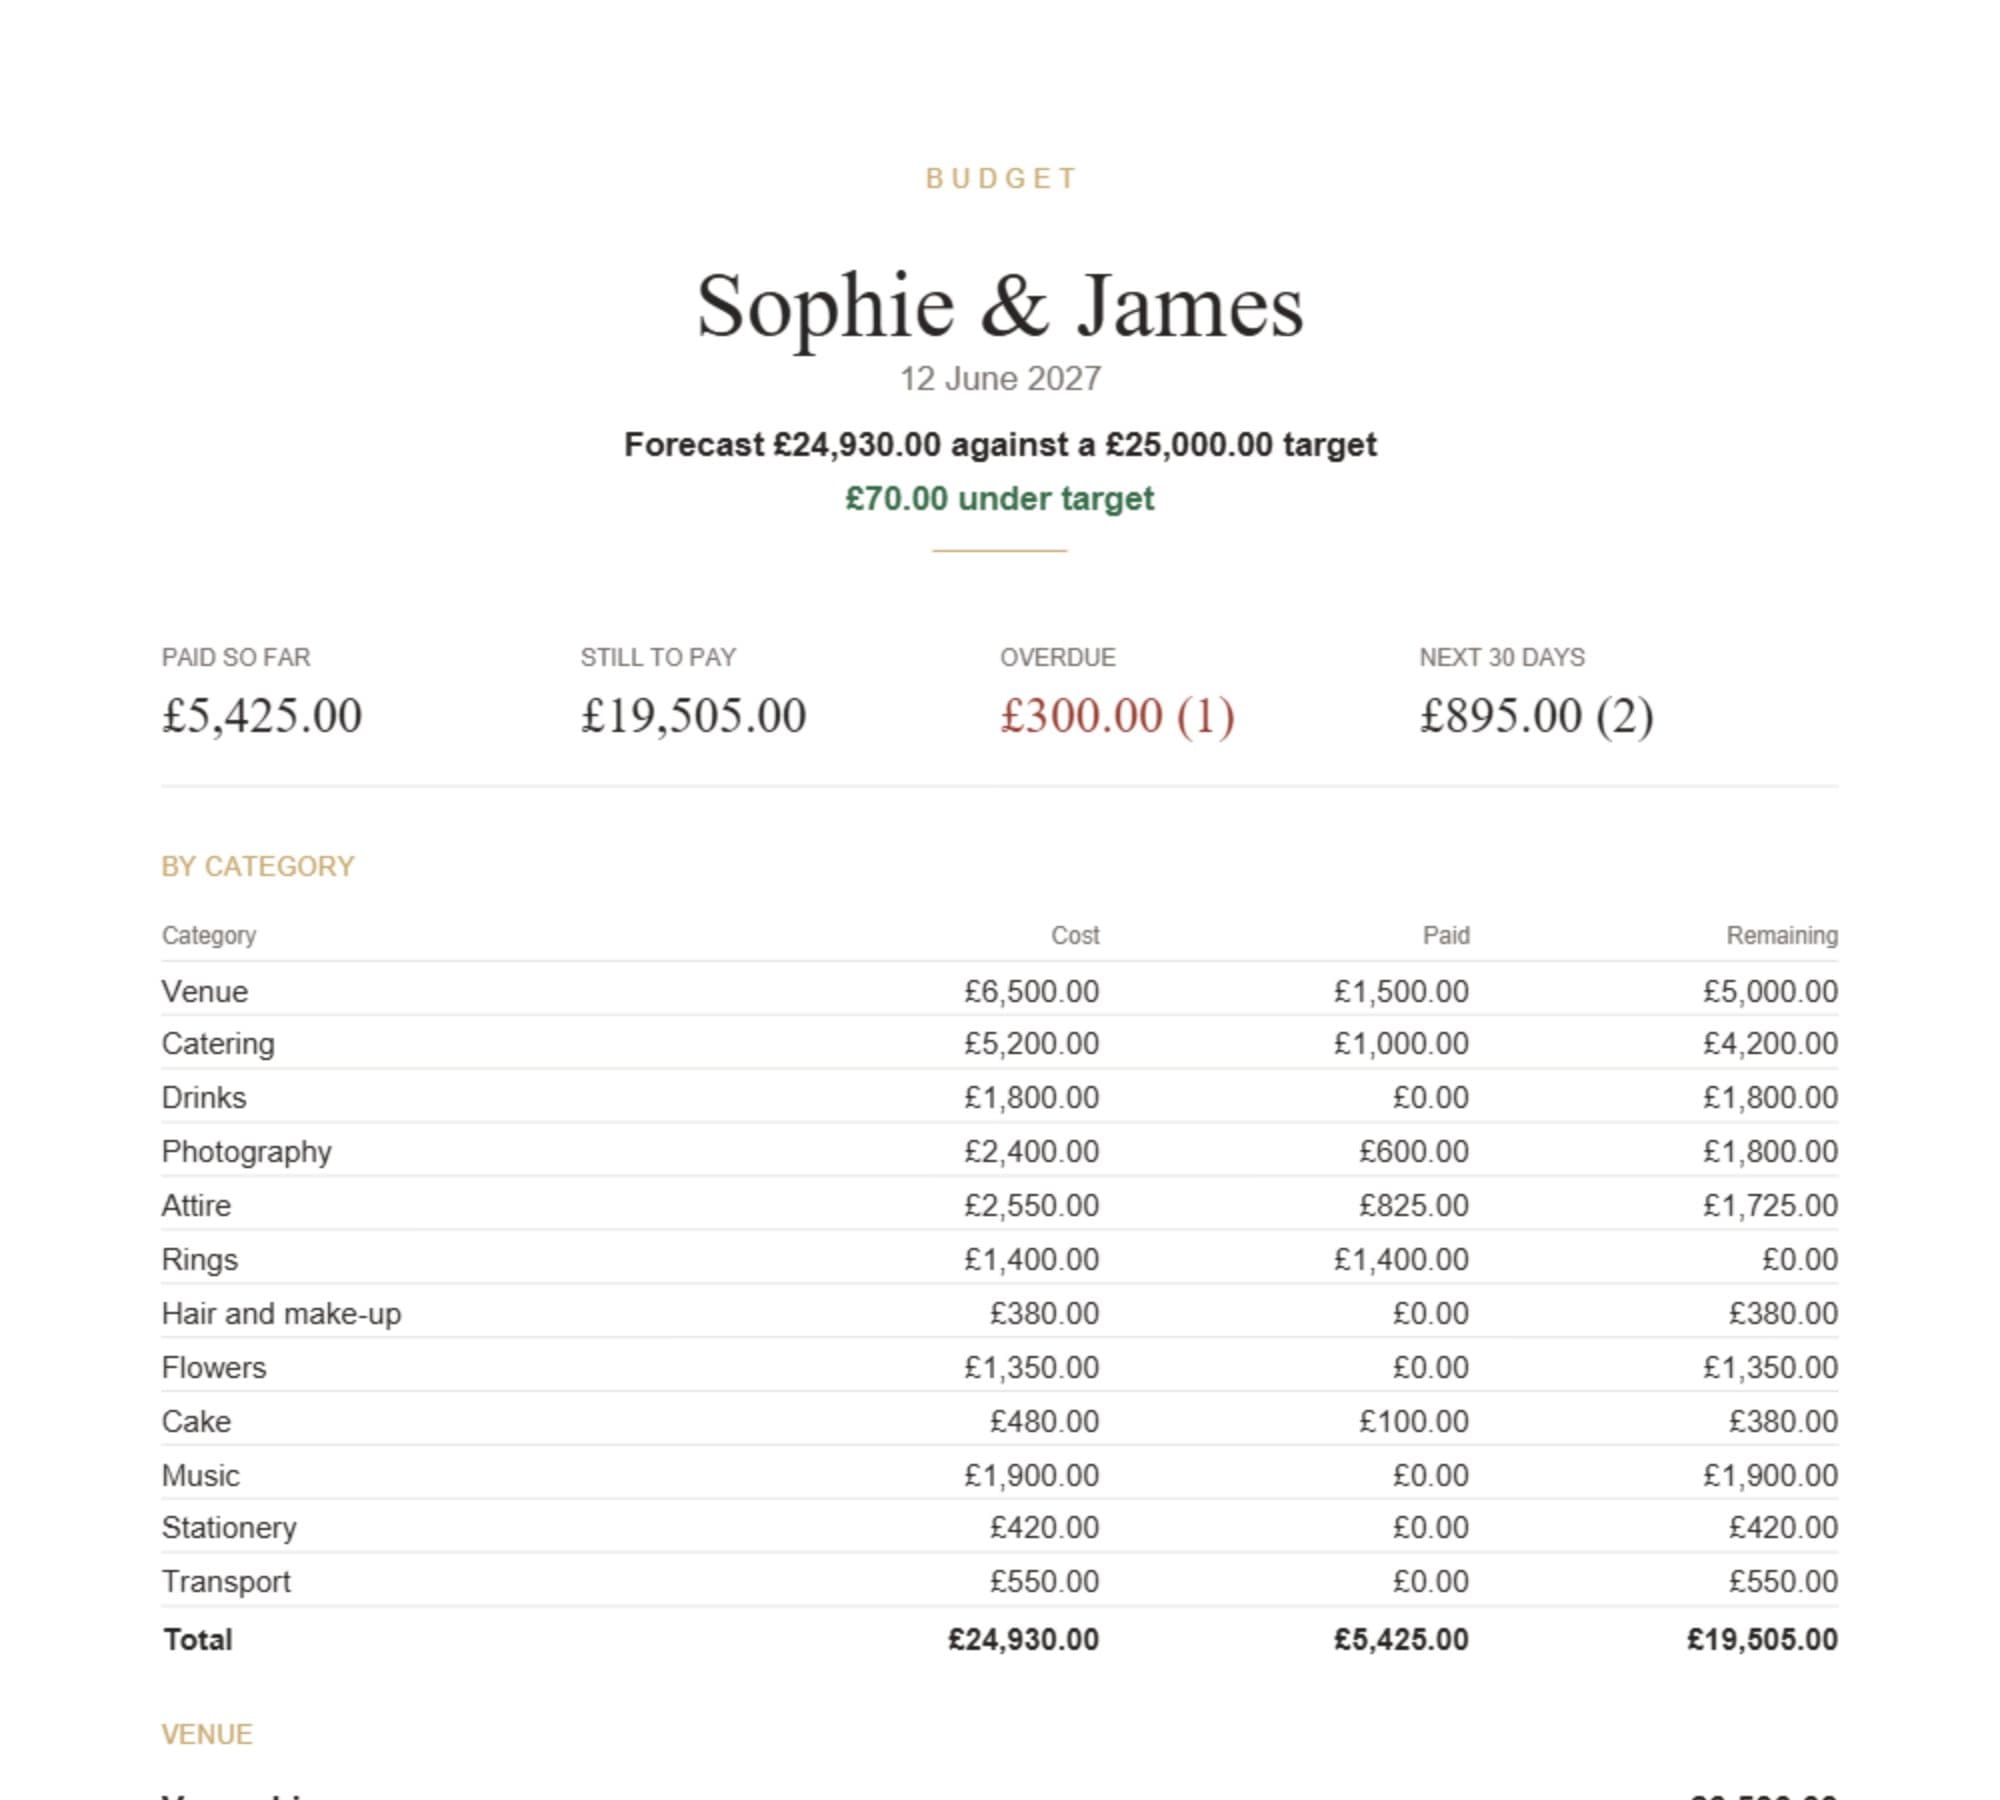
The download button in the toolbar produces a printable sheet: the forecast against your target and the totals by category on the first page, then every item with its supplier and its payment schedule, each payment with a tick box, and finally everything still due in order of urgency. It is the thing to send to parents who are contributing, or to stick on the fridge and tick off by hand.
Co-organisers can edit the budget as well as see it; if you would rather keep it to yourselves, only invite people you are happy to share it with. See Invite a co-organiser for how access works.