Every event starts as a draft that only you (and any co-organisers) can see. You can build, preview and change your mind for as long as you like; guests who open the link early see a Not live yet notice. The top-right of the studio masthead shows a Publish → button, and that button is the whole process. Only the event owner can publish; co-organisers do not see it.
Going live
Press Publish.
If your event has no wedding date yet, a small Before you go live dialog asks for it first: enter the Wedding date and time and press Continue →. The date drives the countdown, the album open date and the data-deletion schedule, so it can’t be skipped.
Then the Publish event modal opens with the plan cards side by side: Free, Starter, Plus and Complete. Plus carries the Recommended badge and is selected to start with. Each card lists what the plan includes; the pricing page has the full comparison if you want to weigh it up first.
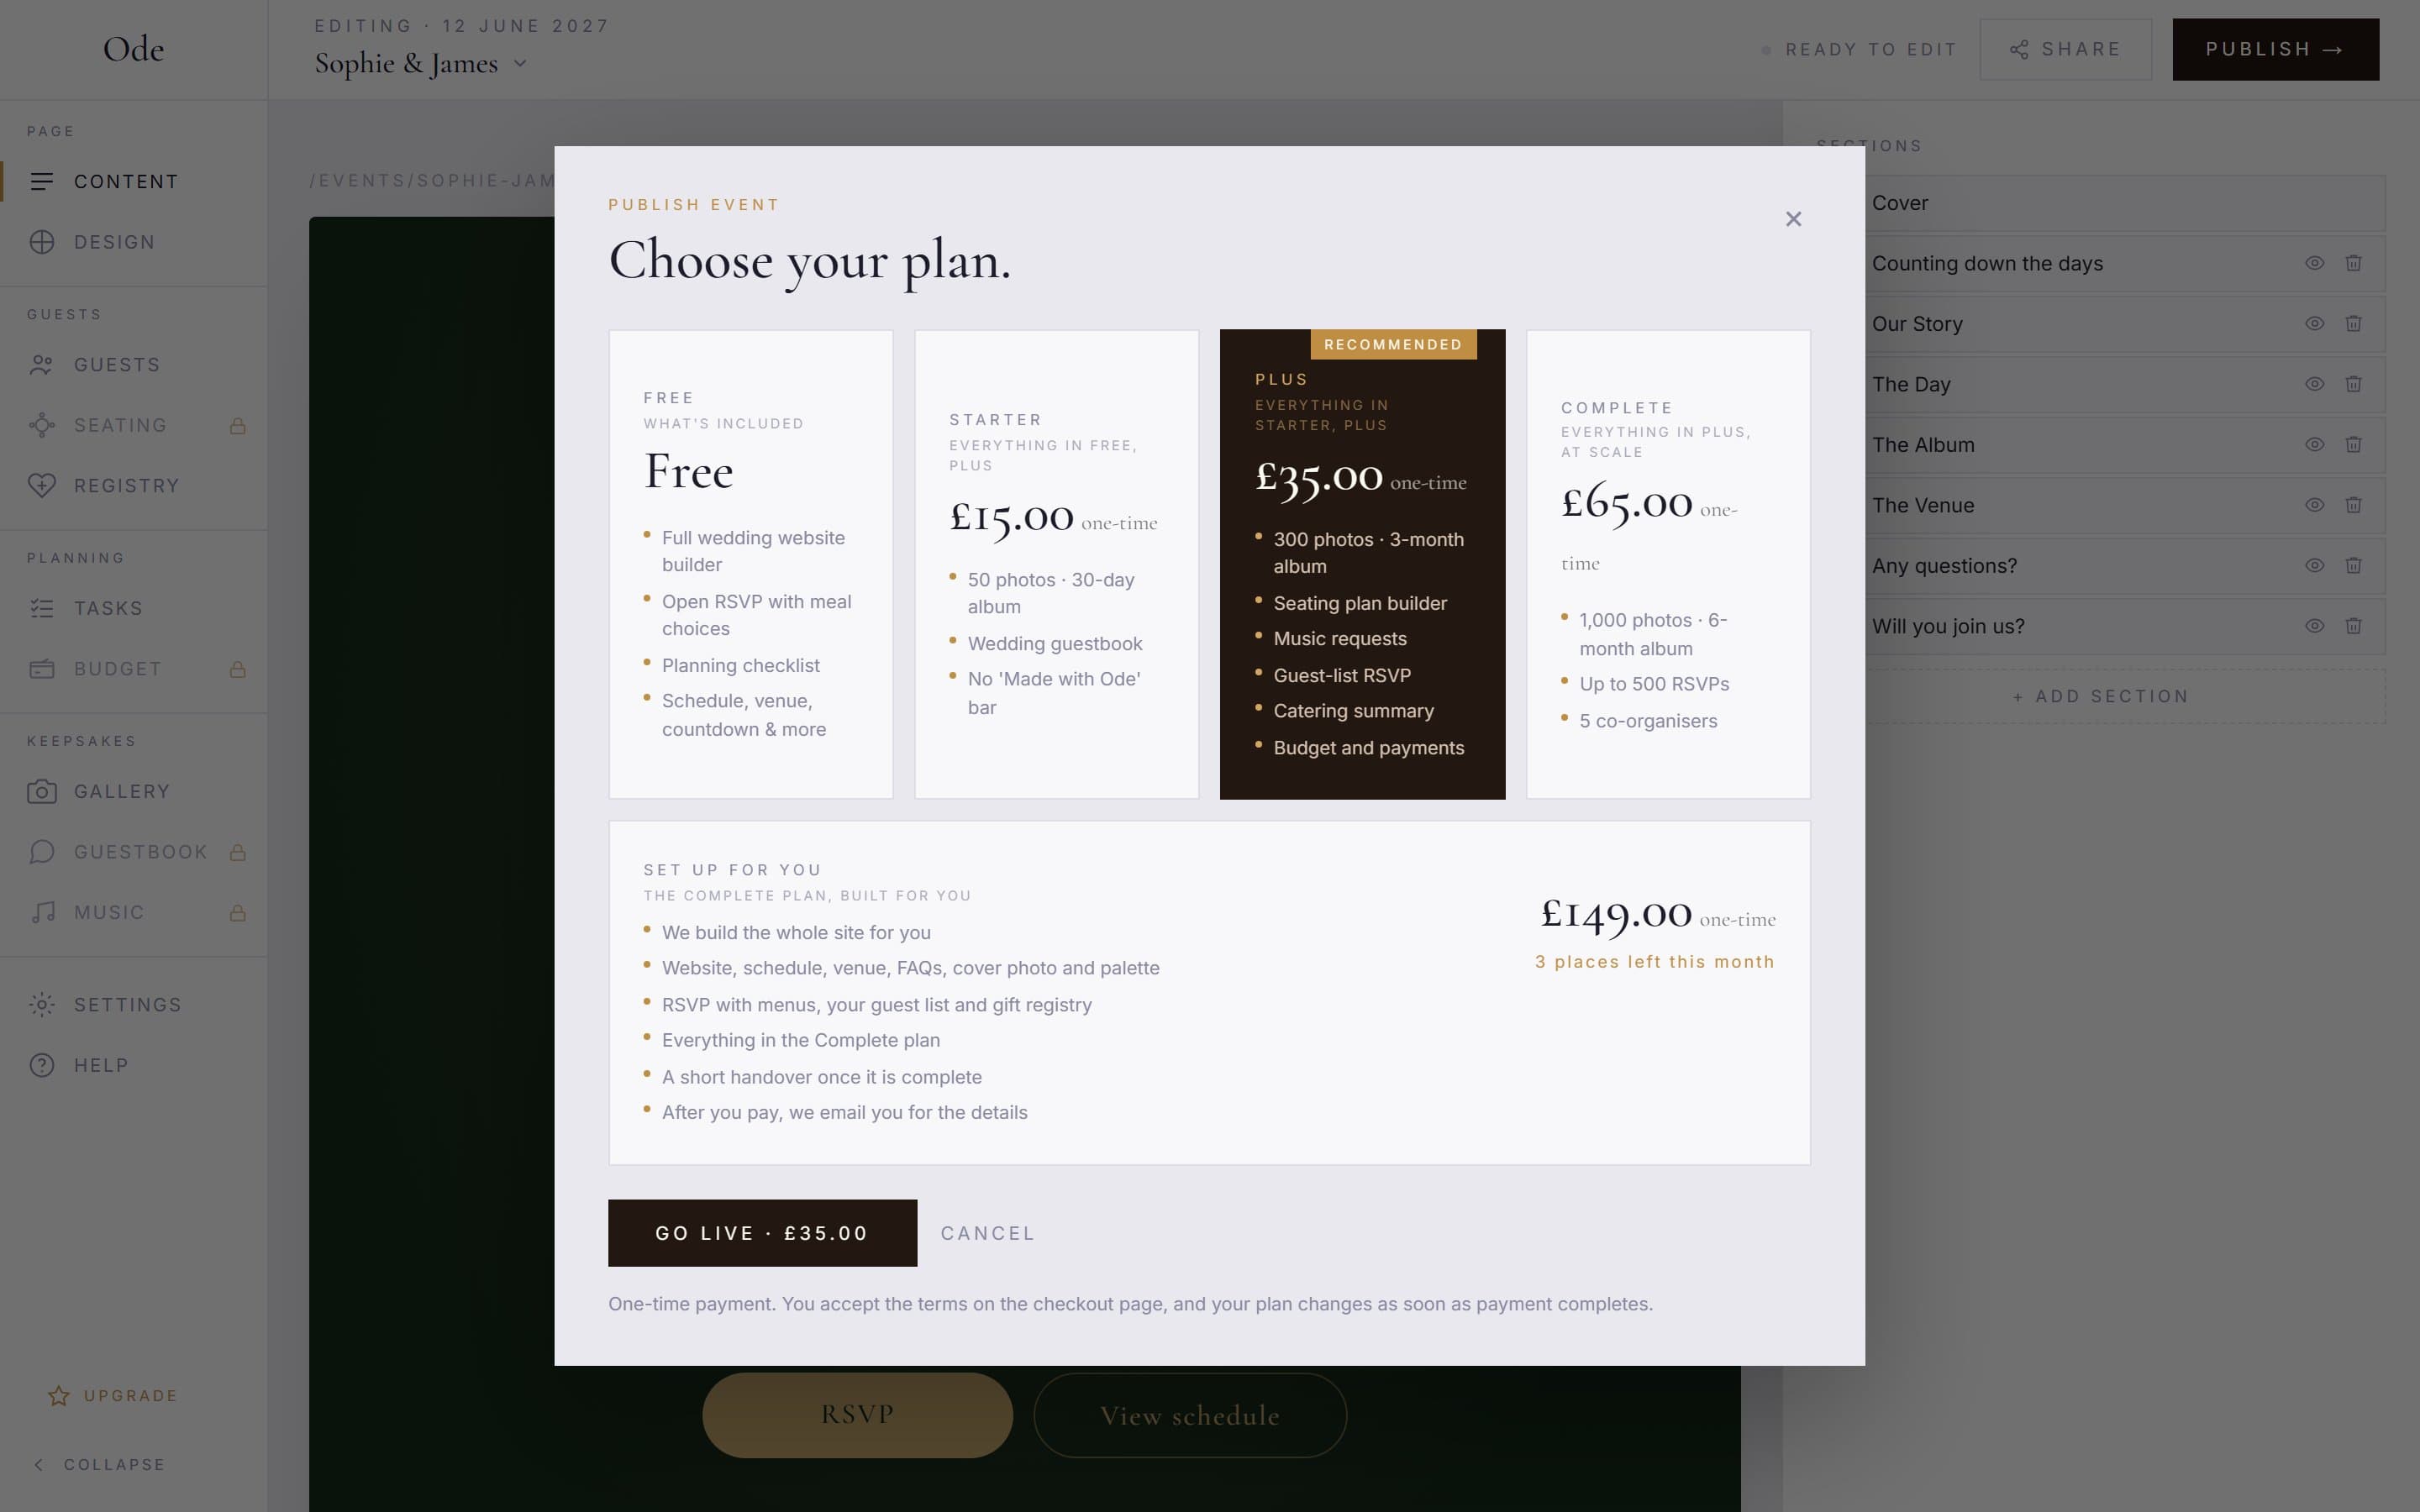
Confirm and go live.
Click a card, then the button below it: Go live, free on Free, or Go live · £15.00 (with the price of the plan you chose) on a paid plan. A short summary appears of what you’re getting and when photos will be deleted. Press Confirm: go live free and your page is live immediately. On a paid plan the button reads Confirm: go to checkout and takes you to Stripe, where you accept the terms and pay; your page publishes as soon as payment completes and a receipt is emailed to you.
If you leave the checkout page without paying, nothing changes: the event stays a draft and the next Publish reuses the same checkout. After a successful payment the studio can briefly show the old plan while the payment is confirmed; refresh the page and Plan & billing in Settings will show the new plan and the payment.
Sharing your link
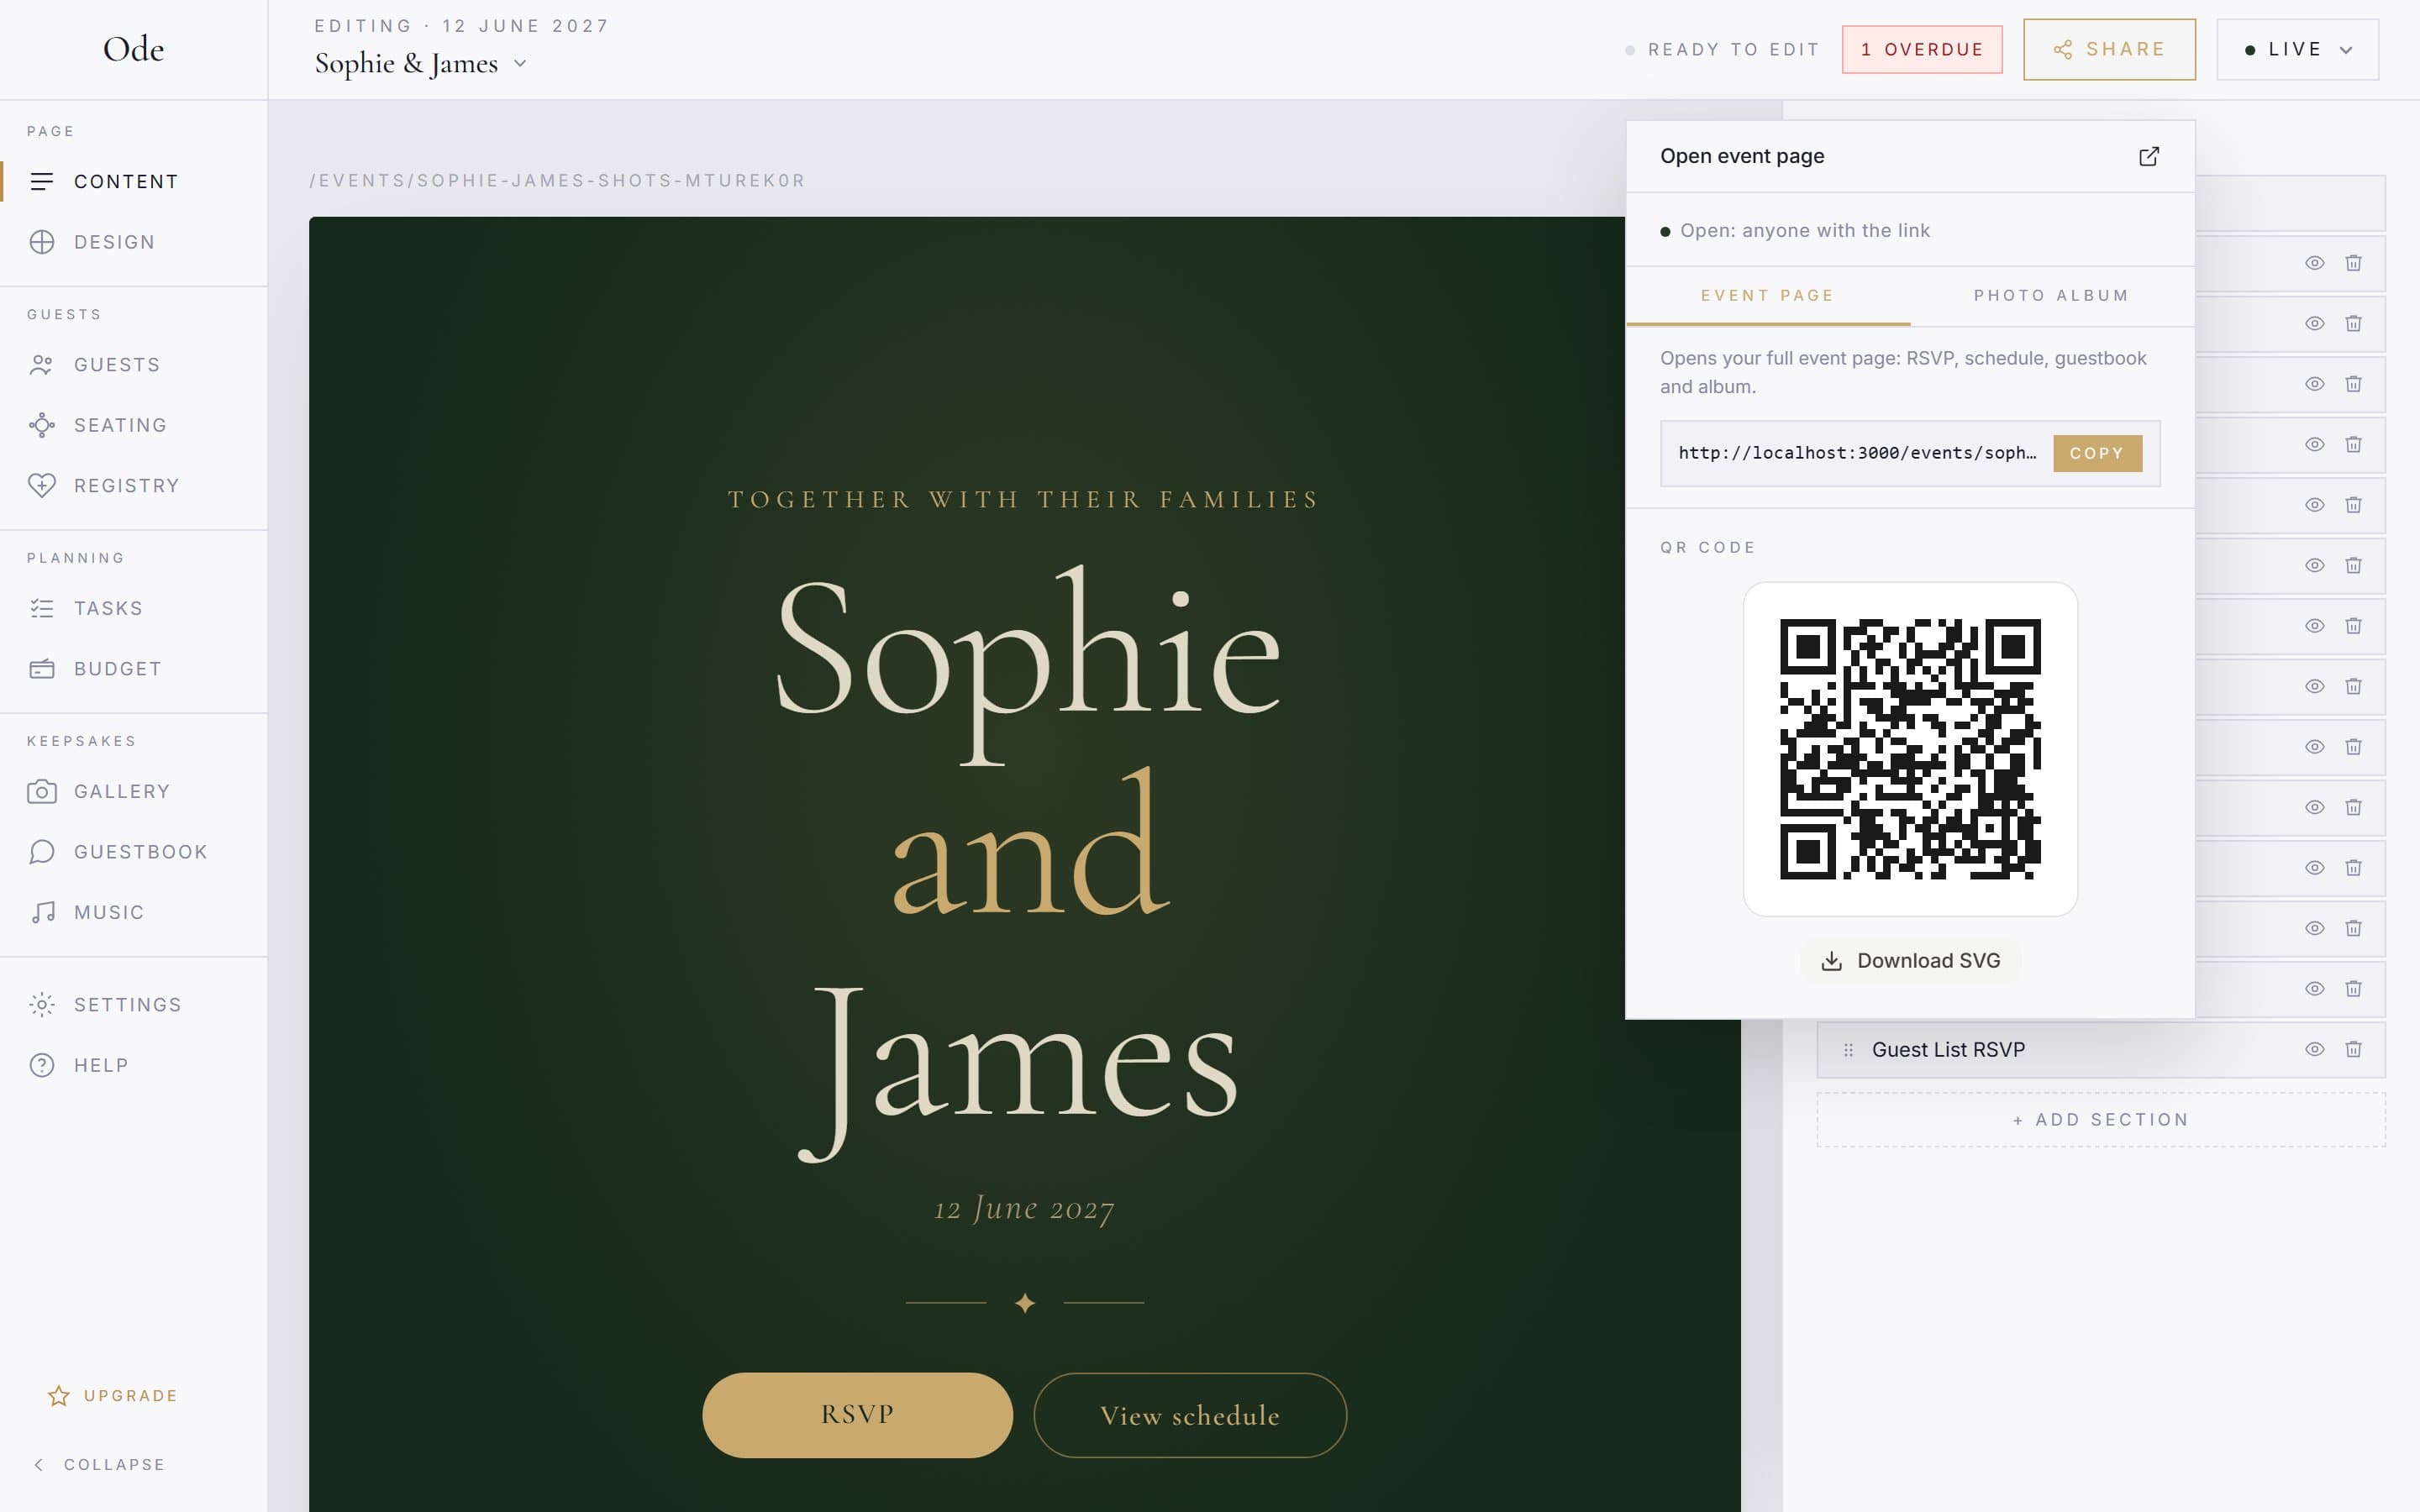
The Share button in the masthead opens a popover. At the top is an Open event page link and a line showing who can currently get in (Open: anyone with the link, Open: password required or Private: organisers only). Two tabs follow: Event page gives the link in the form ode.events/events/your-address, and Photo album gives the same link with /gallery on the end, which opens the album directly and suits table cards and welcome signs. Press Copy (it changes to Copied) to paste it into a message or invitation.
Below the link is a QR code for whichever tab is selected, with a Download SVG button. SVG scales cleanly, so it prints sharply on save-the-dates and table cards, and guests reach the page from a phone camera without typing anything. The Share popover works while the event is still a draft, so you can prepare stationery early; the link just shows Not live yet until you publish.
Who can open the link depends on your privacy settings; if you’ve set a password, guests need it before they see the page. See Privacy, passwords and guest permissions for the options.
Editing after you go live
Going live doesn’t freeze anything. Keep editing in the studio as normal; changes save automatically and guests see the updated page on their next visit. It’s fine to publish early with the basics and fill in the details as plans firm up. The one thing that does lock is the album open date, once the first photo has been uploaded.
Draft, Live and Ended
Once published, the Publish button becomes a status pill showing Live. Click it to switch between three states, each explained in the menu:
- Draft takes the page offline. Choose it and a Take the page offline? prompt confirms with Switch to draft. Guests who open the link see Not live yet until you switch back. Nothing is deleted.
- Live is the normal state. Switching back to it from Draft or Ended is a plain flip with no payment.
- Ended is for after the wedding. An End this event? prompt confirms with Mark as ended. The page and album stay up for guests to look back on, but everything guests can send you closes: RSVPs show This event has ended and RSVPs are closed, uploads stop, and guestbook messages, song requests and gift claims close (registry items show Taken or Closed badges).
Ended does not pause the album window: the closing date is fixed by your album open date and plan, and photos are still deleted when it arrives. Nothing is deleted by changing state, and you can move between them whenever you like.