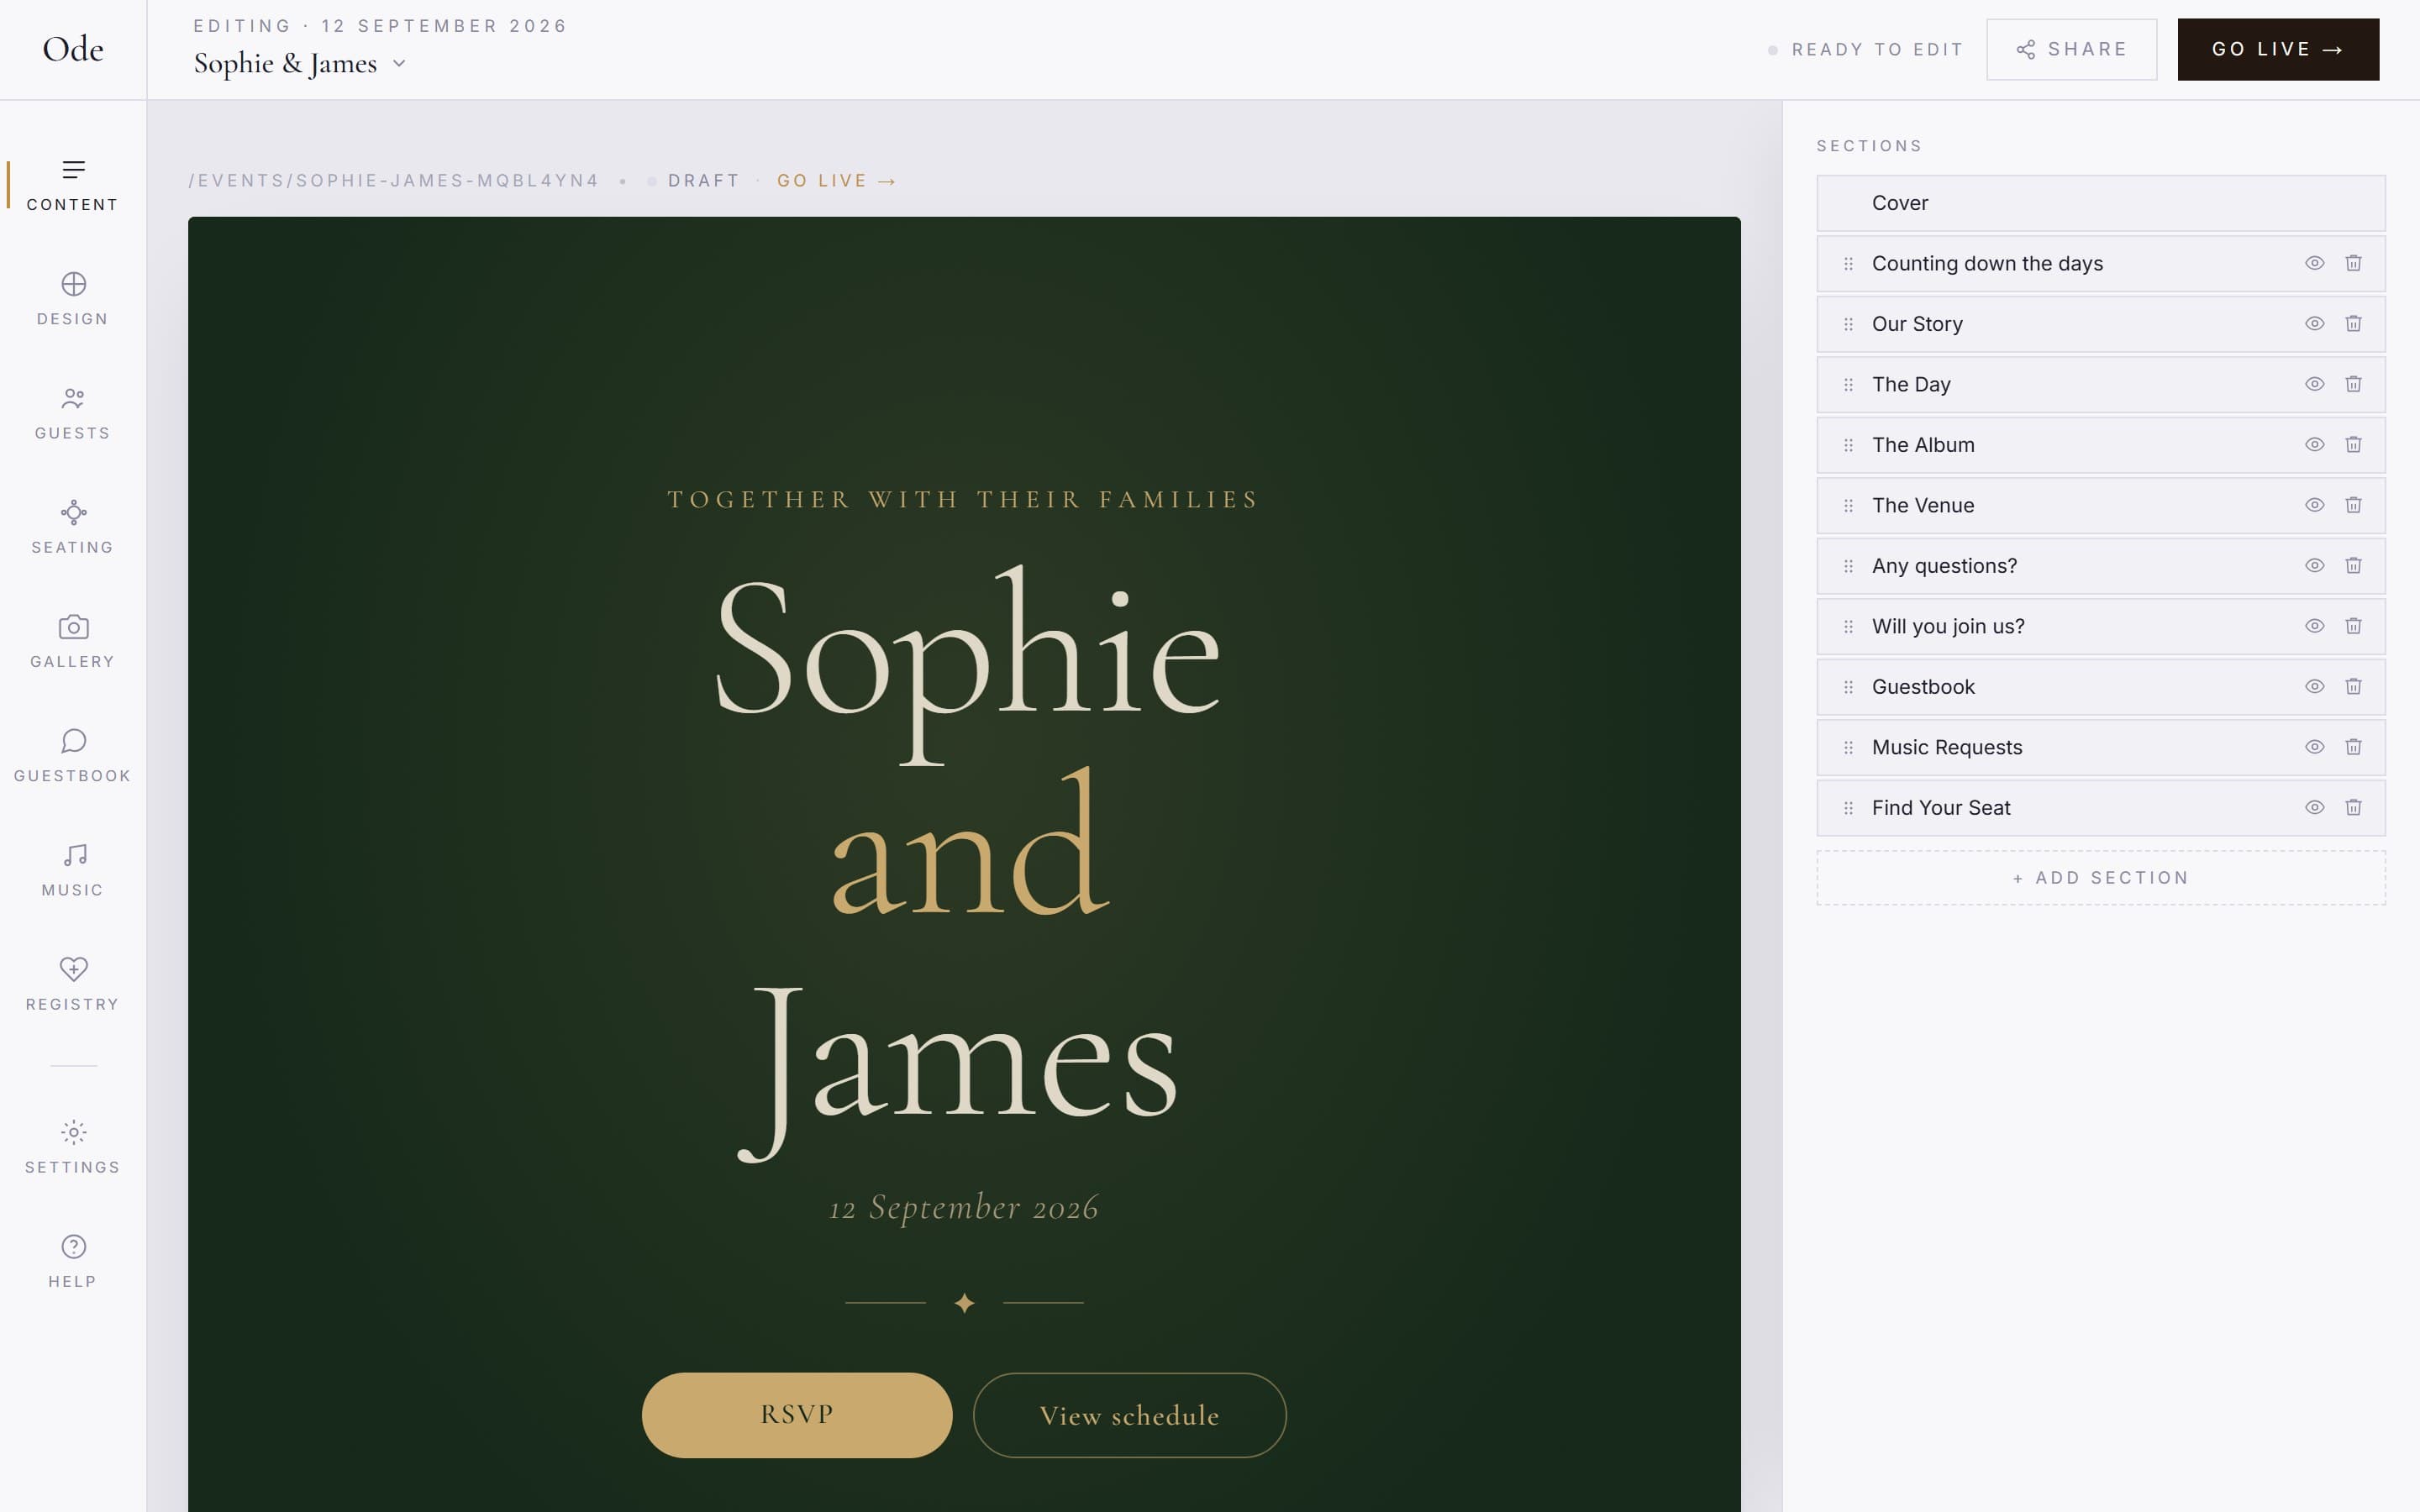
The studio is split into workspaces, listed in the rail down the left side on desktop: Content, Design, Guests, Seating, Gallery, Guestbook, Music, Registry, then Settings. Most of your time goes into the first two, which is what this guide covers.
The Content workspace
The canvas in the middle is a live preview of your page, exactly as guests will see it. Click any section to select it and an inspector opens with that section’s settings: headings, text, images and so on. Changes appear in the preview as you type.
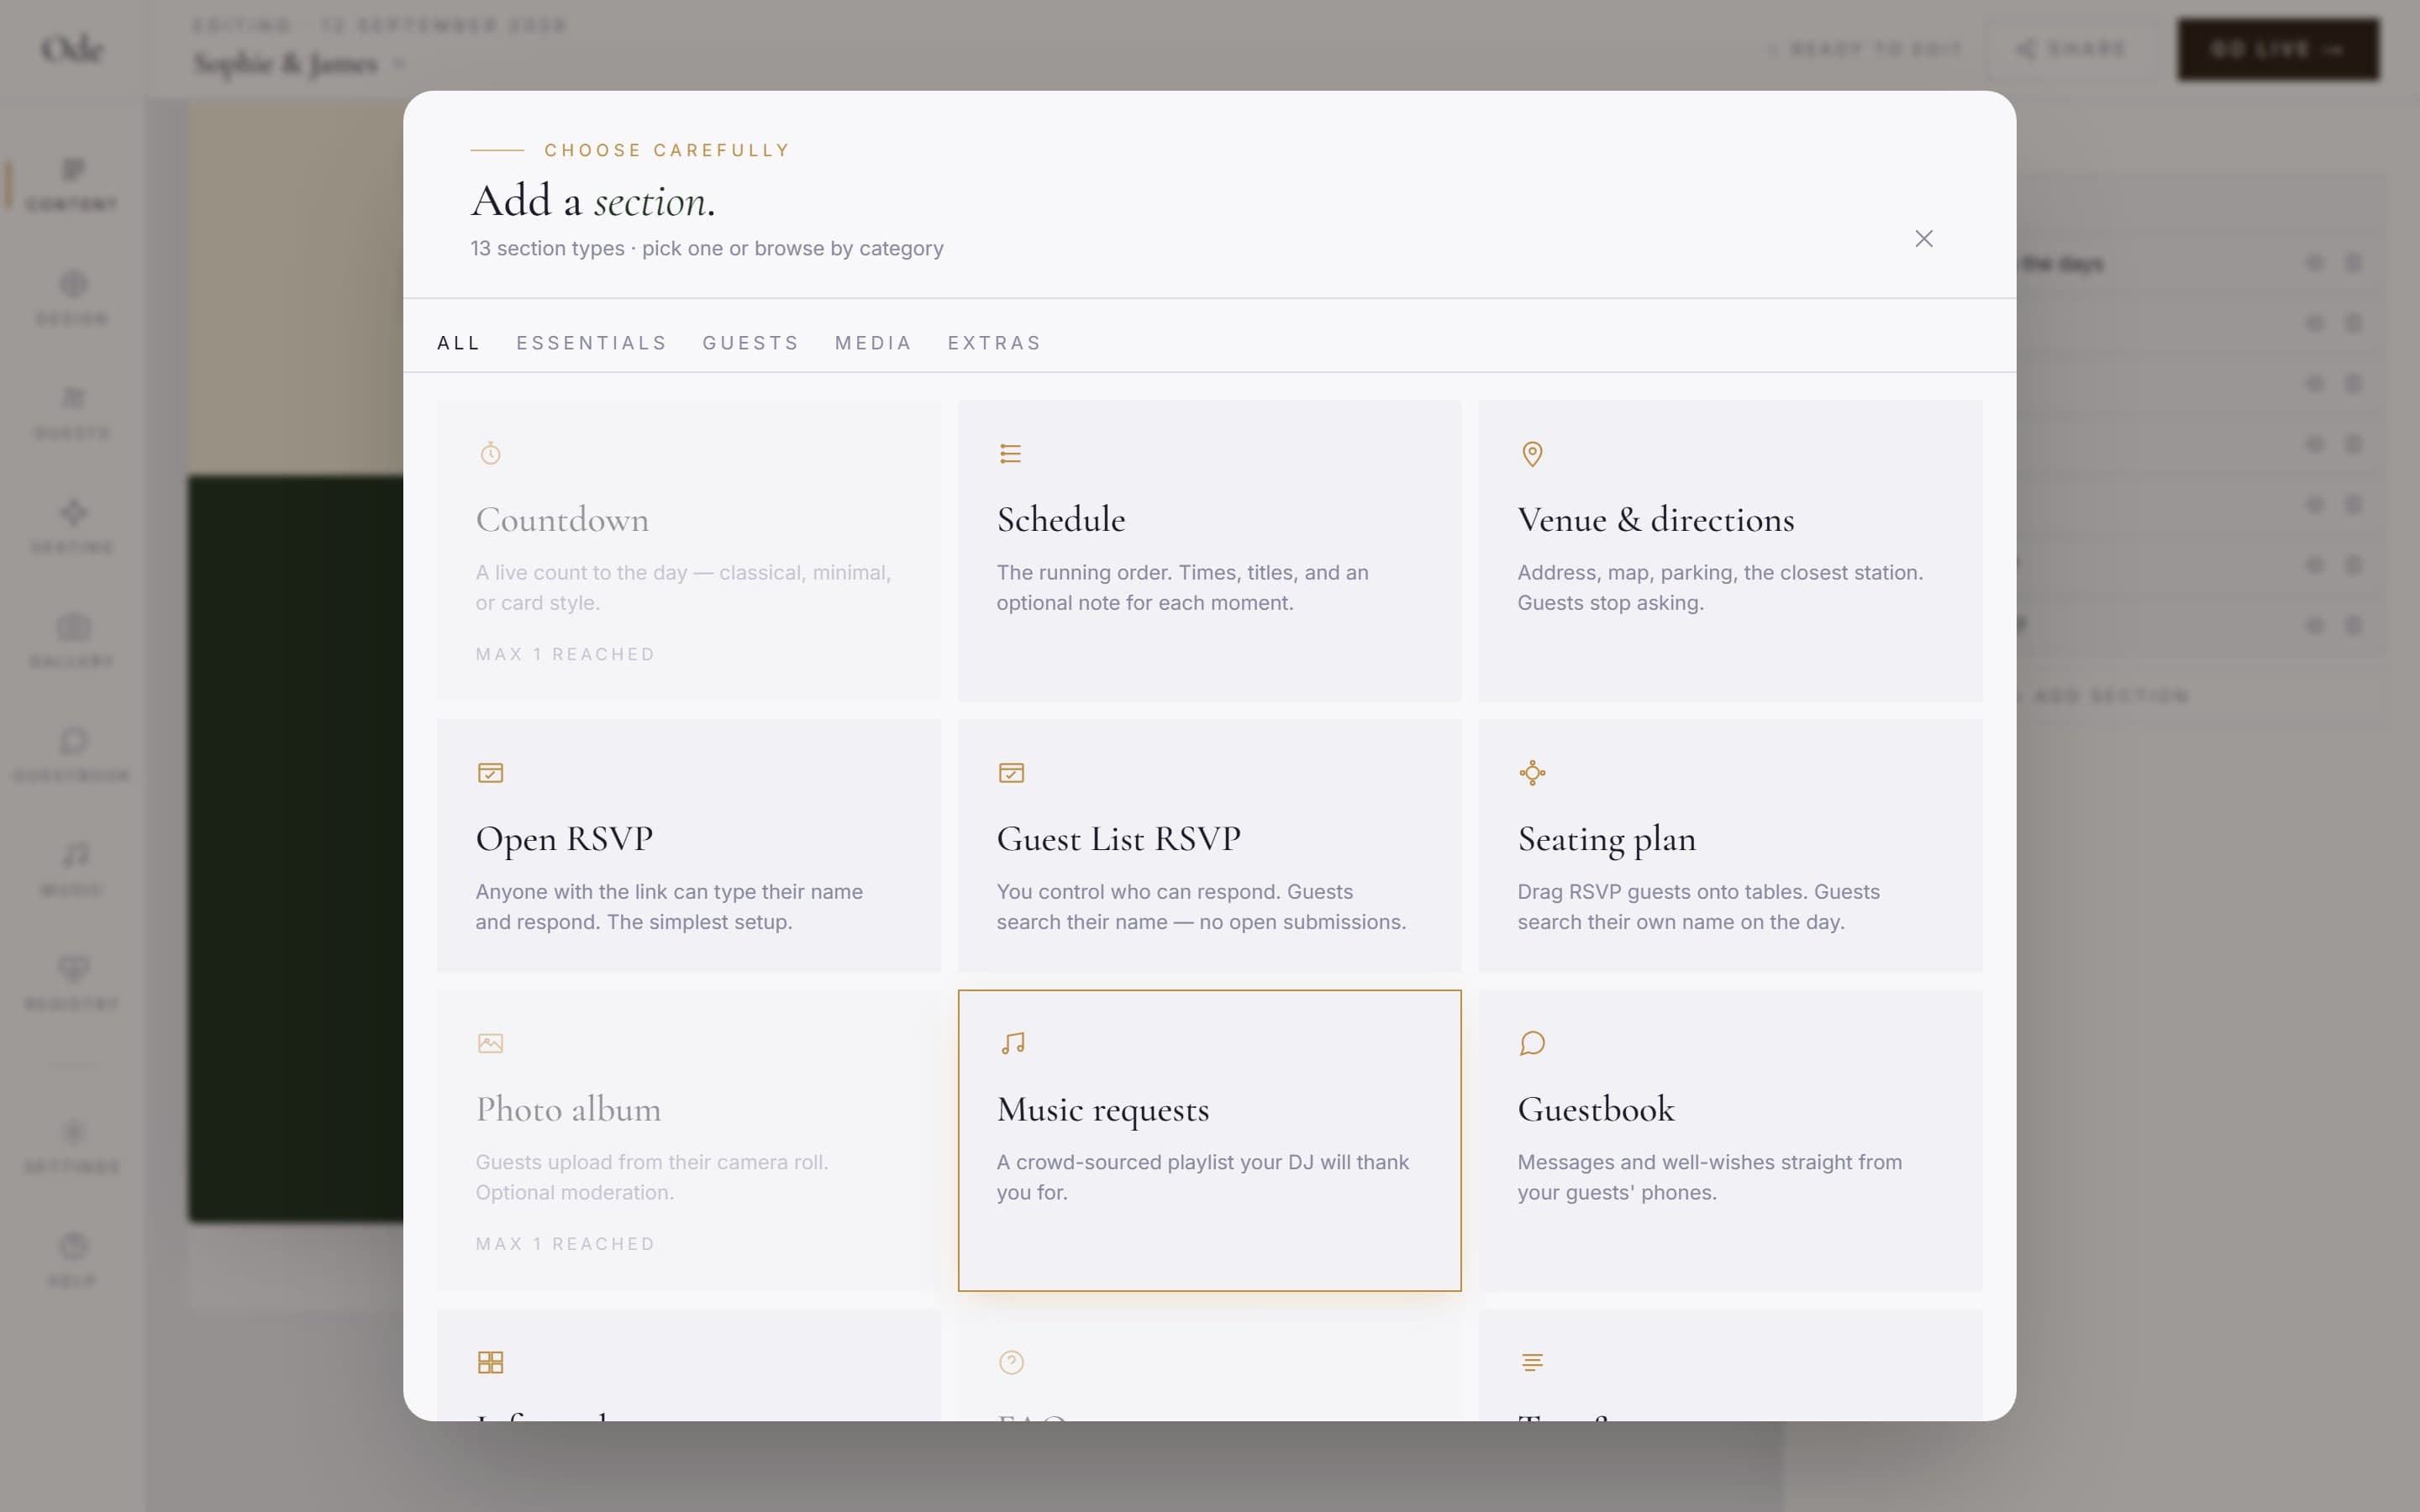
Add a section.
Open the section library, titled Add a section. Use the category tabs to browse: All, Essentials, Guests, Media and Extras. Tiles that need a higher tier carry a Plus badge. Pick one and it drops into your page straight away.
Arrange and style it.
Every section has a small toolbar. The up and down arrows reorder it on the page, the eye icon hides it from guests without deleting anything, and the three background swatches switch the section’s background. The delete control asks for confirmation first, so a stray click won’t lose your work.
Configure the interactive sections in their own workspace.
RSVP, Gallery, Guestbook and Music sections show their content settings elsewhere; selecting one gives you a shortcut in the inspector, such as Go to Guests for RSVP. The section on the page controls how it looks; the workspace controls how it behaves. See Set up RSVPs and meal choices and Set up the photo album for the two big ones.
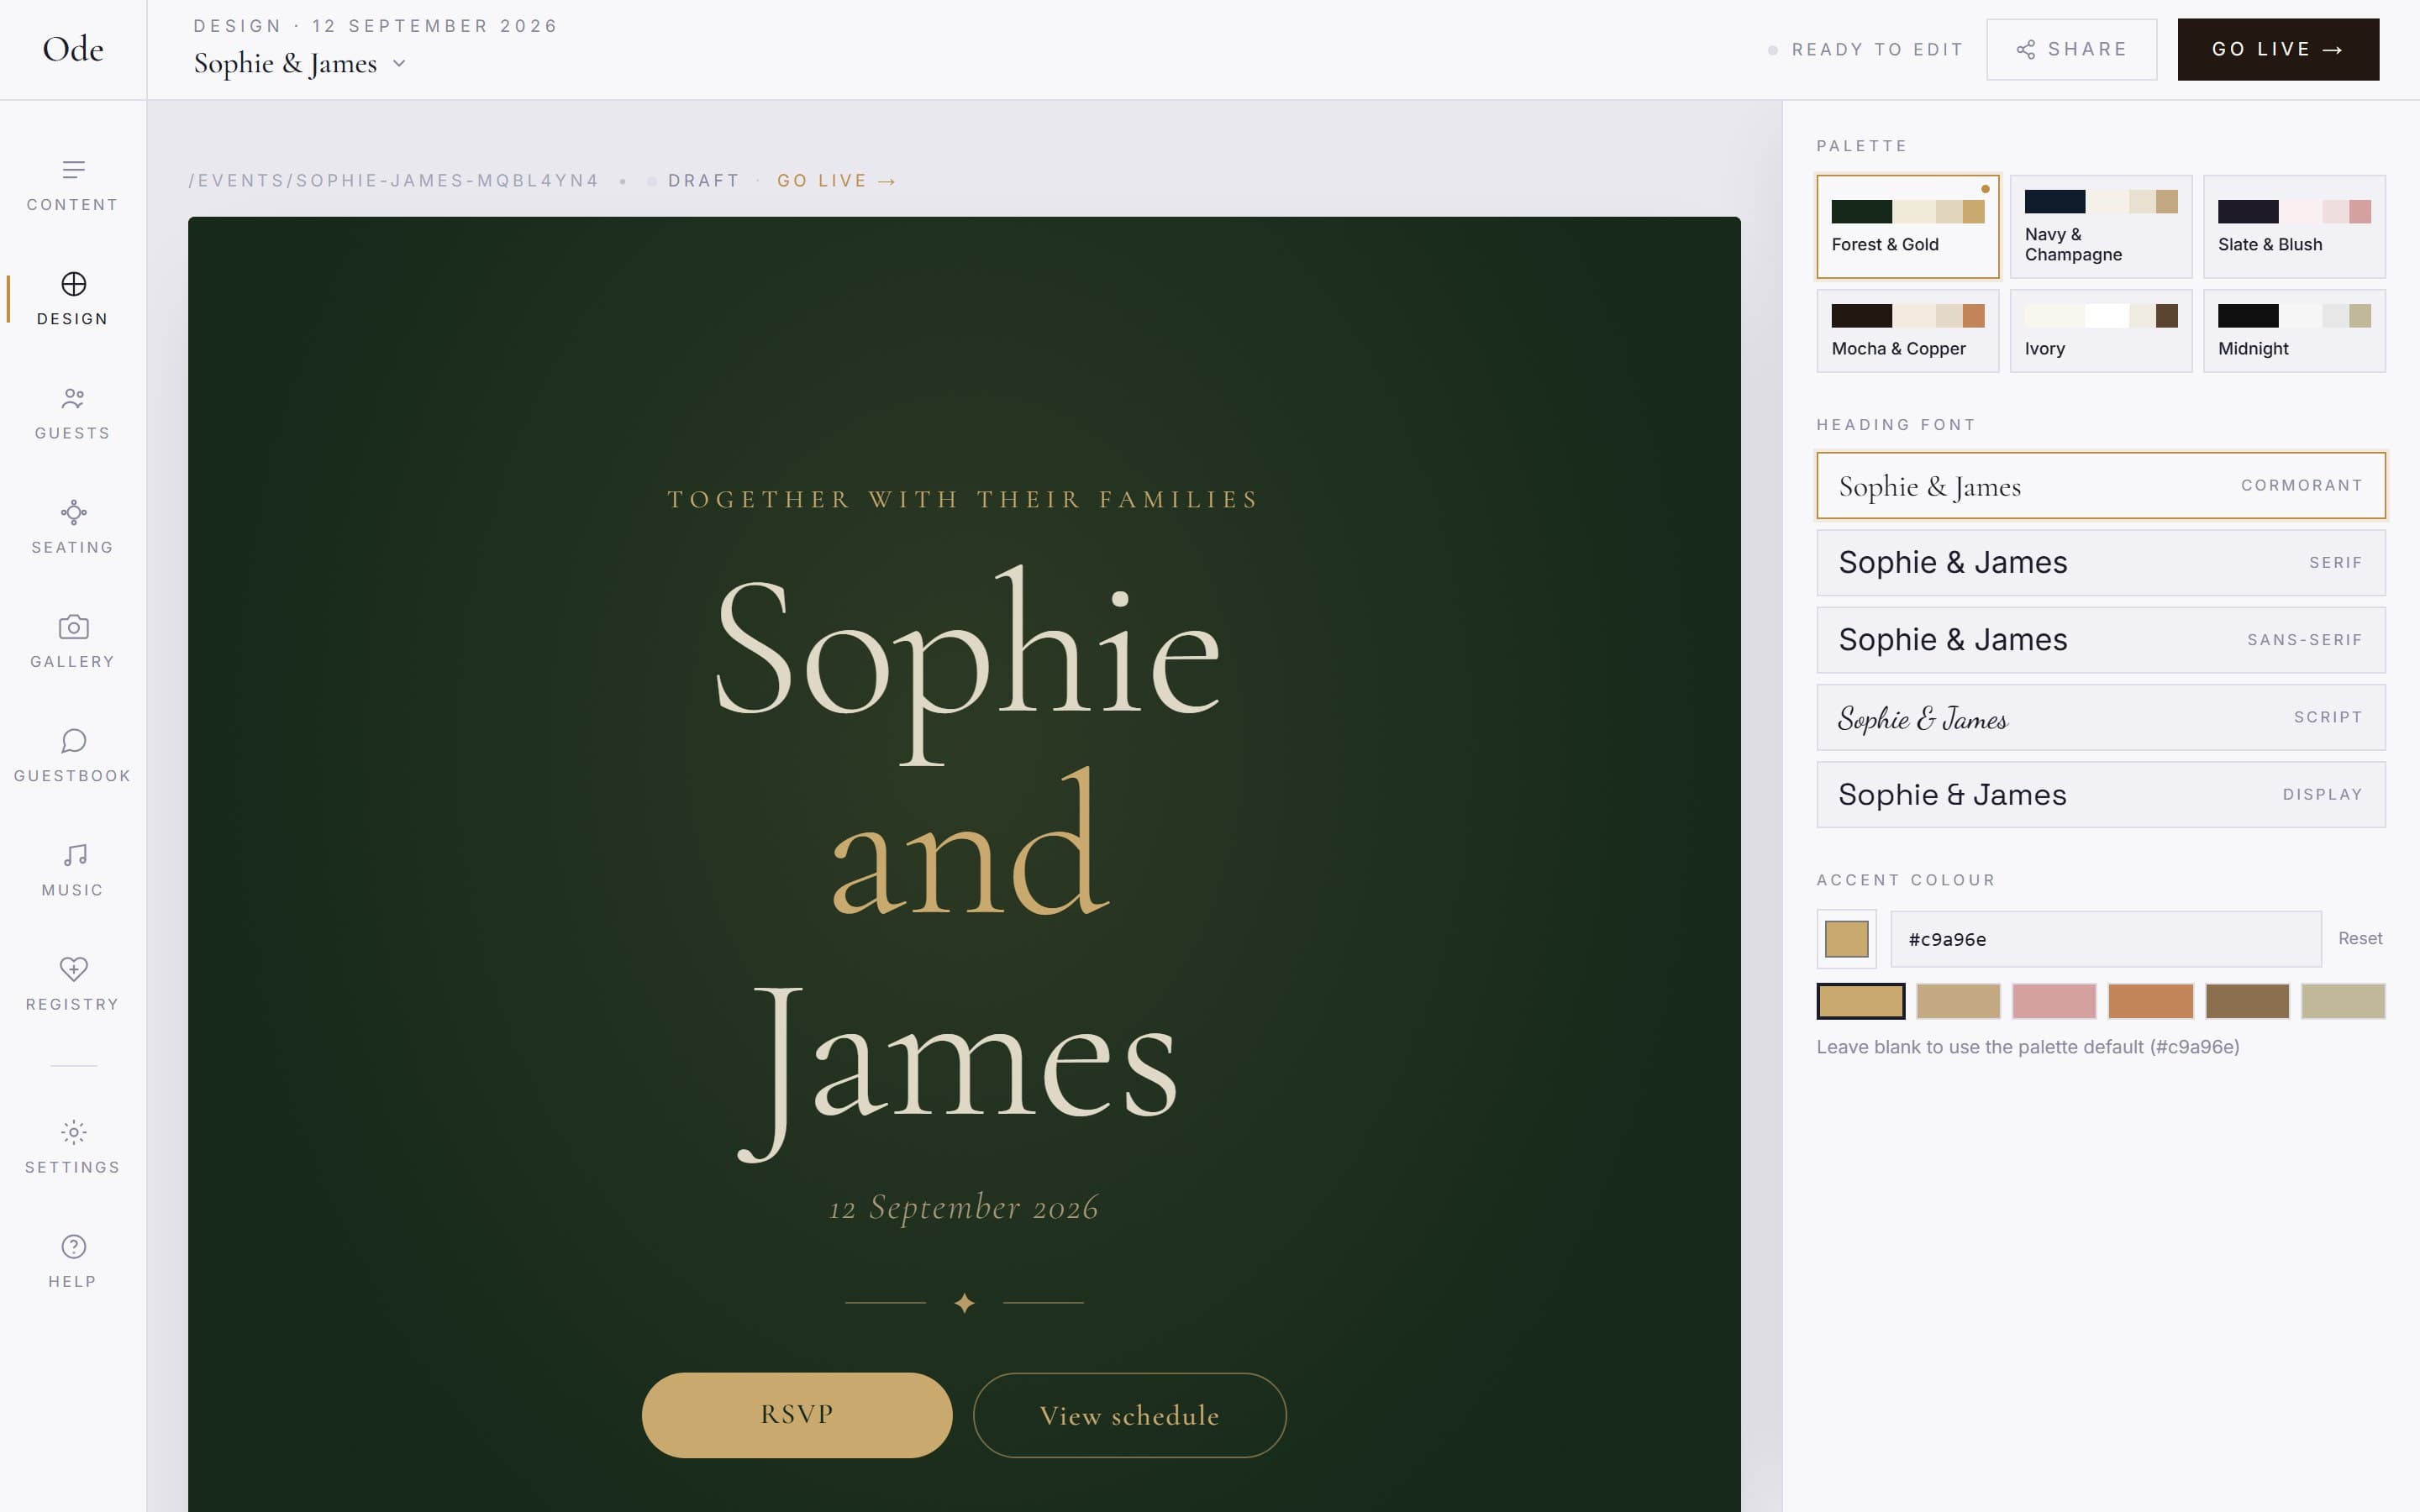
The Design workspace
Design controls the look of the whole page. Palette tiles switch your colour scheme, and below them an accent colour input takes any hex value, with presets to choose from and a reset if you wander too far. Font tiles change the type style. Everything previews live on the canvas, so you can flick between palettes and watch the page change.
There is no save button. The studio saves automatically and the top bar shows Saving… then Saved so you know where you stand.
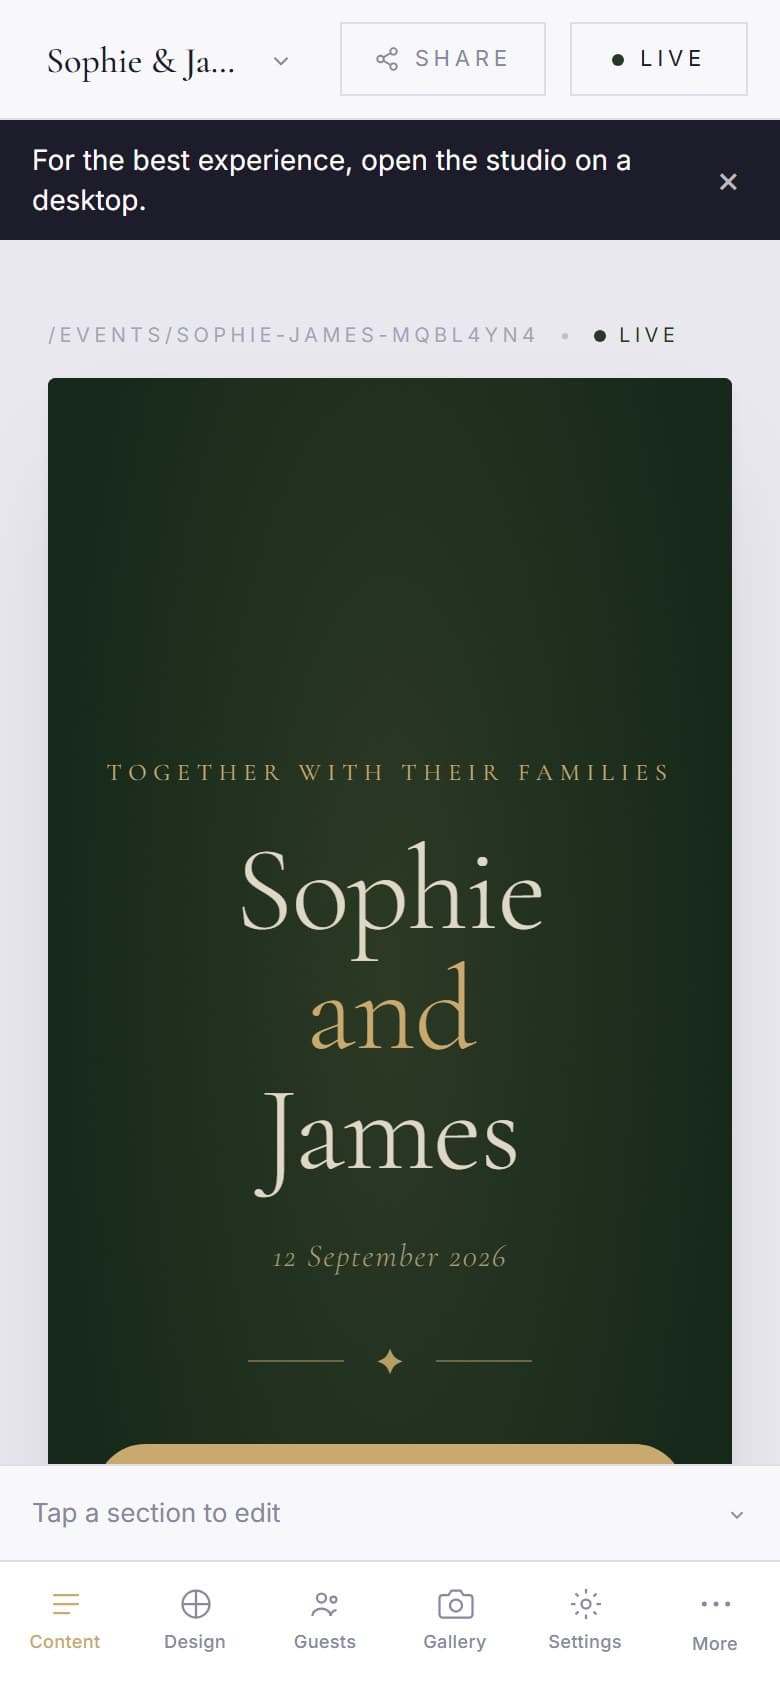
On a phone or tablet
On smaller screens the rail becomes a bottom tab bar with Content, Design, Guests, Gallery and Settings, plus a More overlay for the remaining workspaces. A banner notes For the best experience, open the studio on a desktop. — quick edits work fine on mobile, but building the page from scratch is easier with a bigger screen.