The photo album collects everyone’s pictures of the day in one place, without apps or accounts. It’s managed in the Gallery workspace, which has two tabs: Photos, where the pictures live, and Settings, where you decide how the album behaves. For how guests share photos on the day, see wedding photo sharing.
Album settings
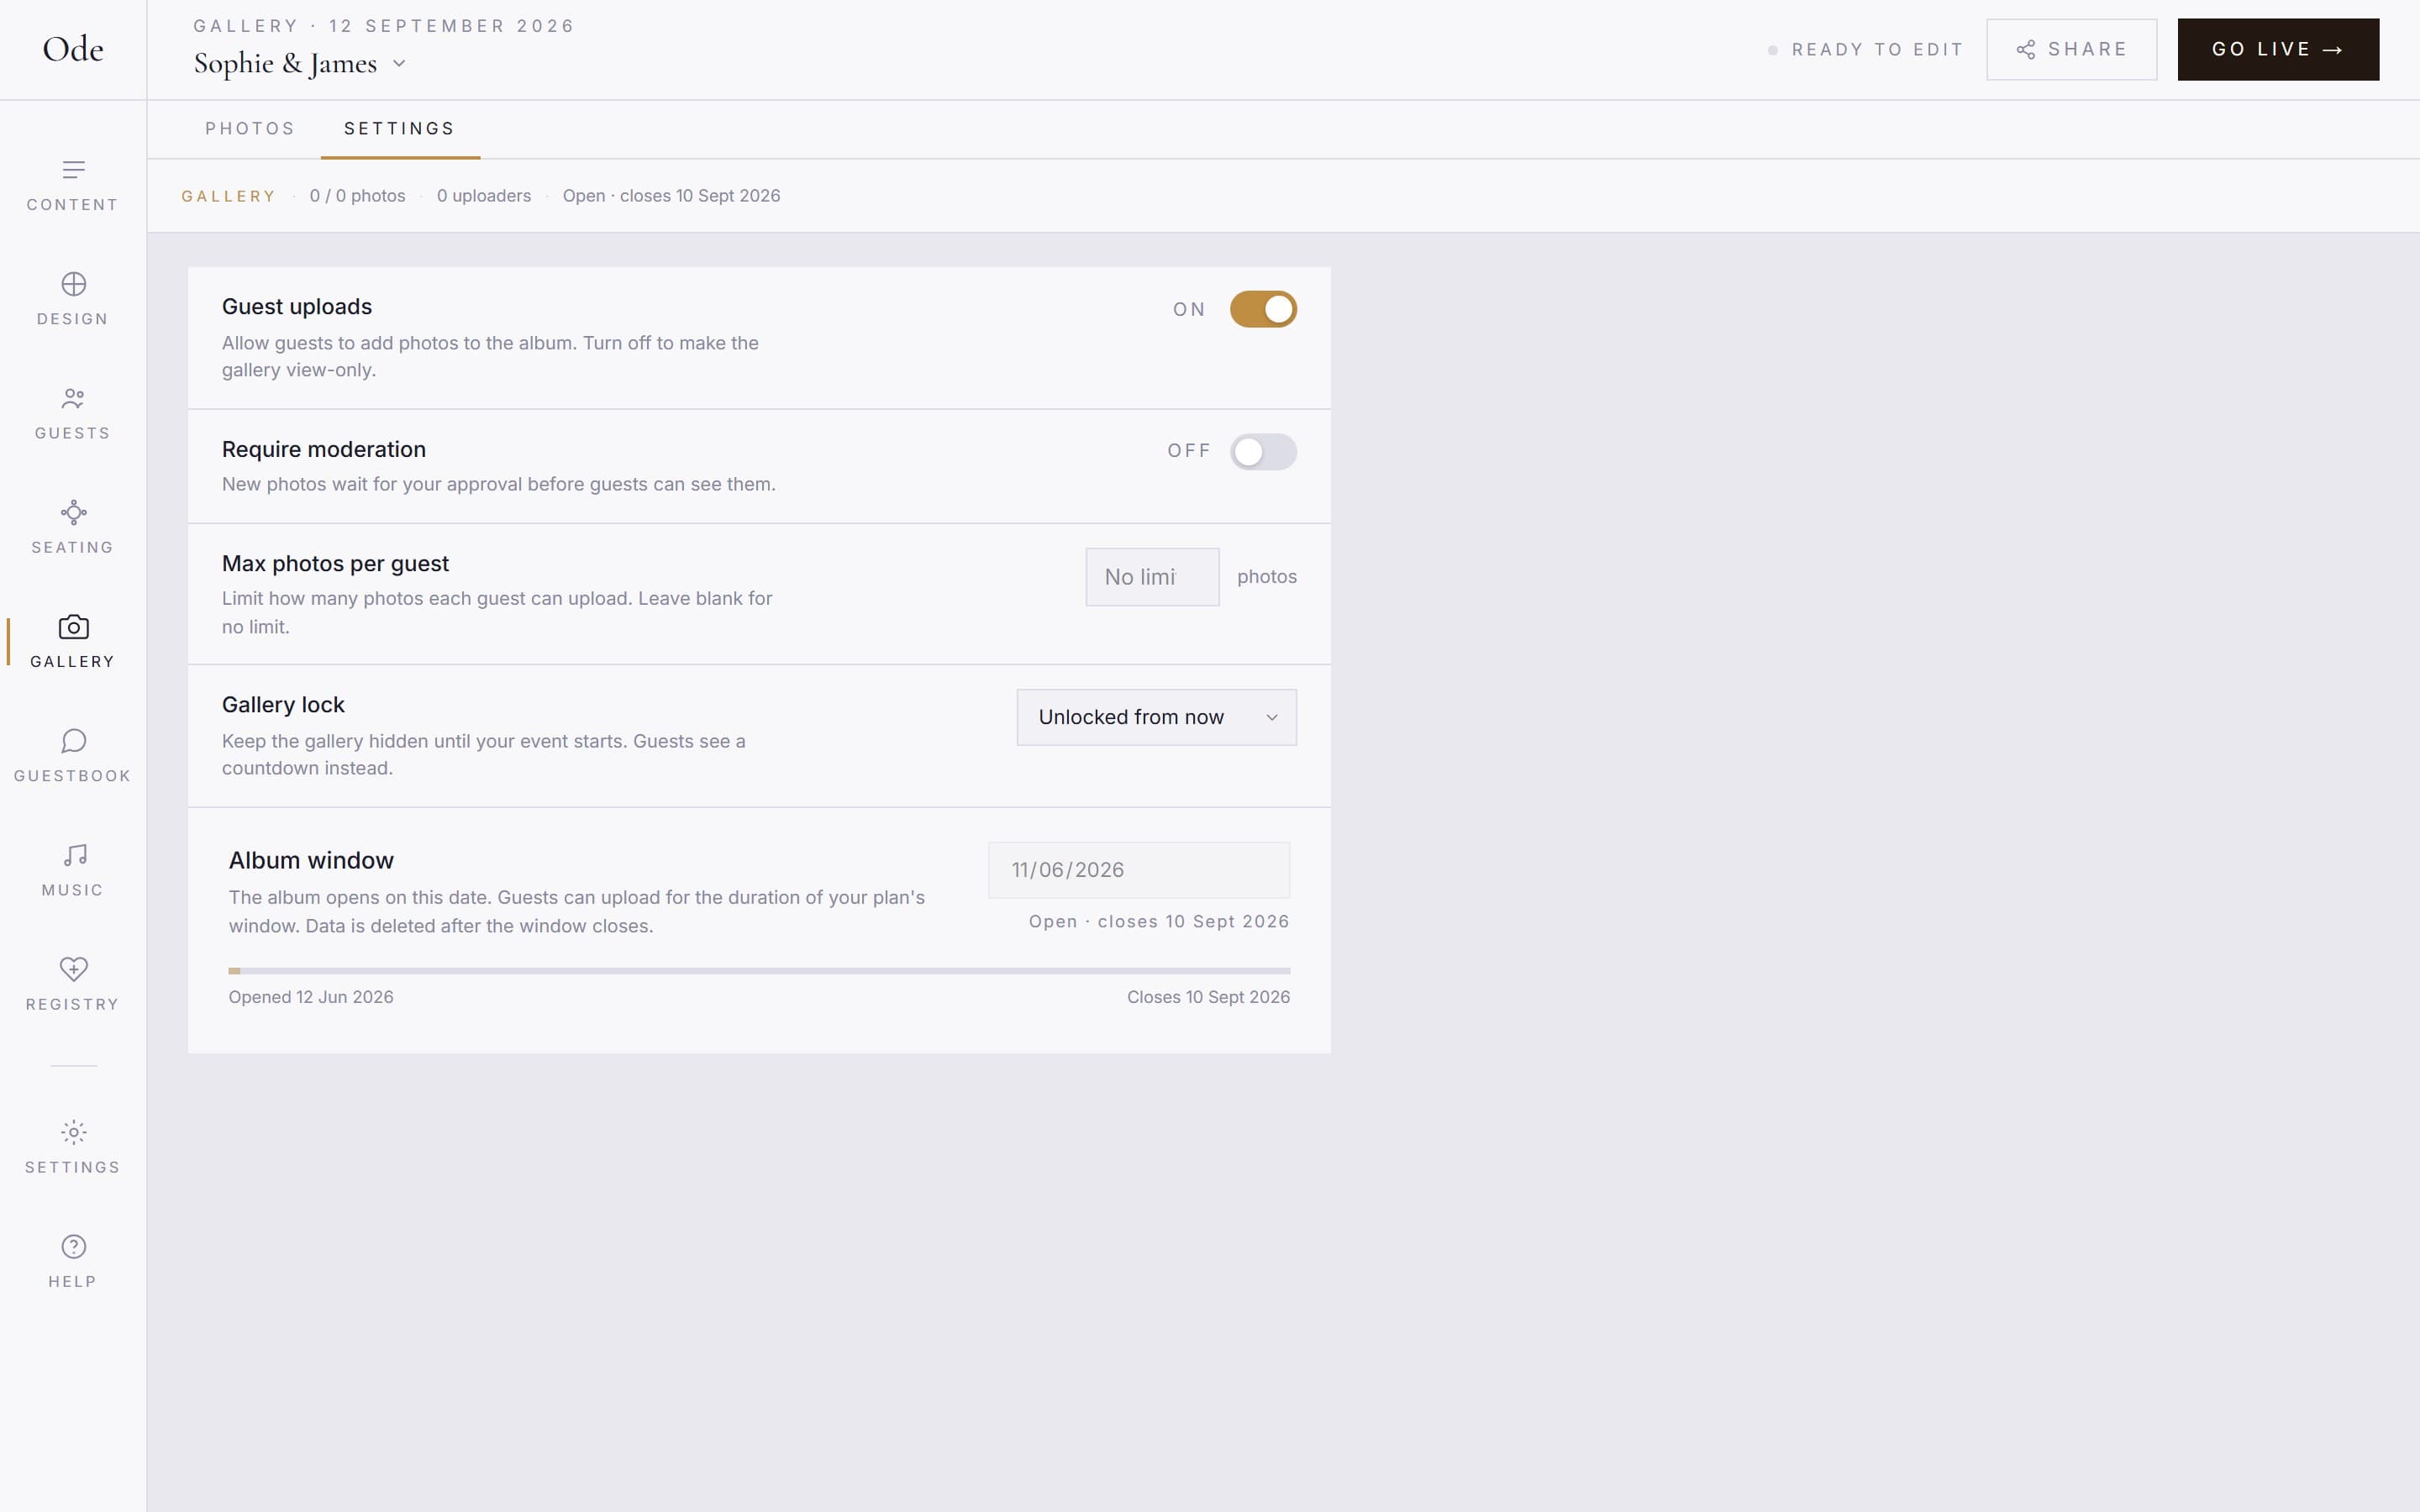
Decide whether guests can upload.
The first toggle controls guest uploads. Leave it off and the gallery is yours alone; turn it on and anyone viewing your page can add photos.
Choose your moderation level.
Require moderation means, as the setting puts it, You approve each guest photo before it appears in the gallery. A sub-toggle, Also moderate organiser uploads, extends the same queue to photos added by you and your co-organisers.
Set a per-guest limit, if you want one.
An optional limit caps how many photos each guest can add, which keeps one enthusiastic uncle from filling the album. Organisers are never limited.
Set the album window.
When guests can upload sets the date and time the album opens. As the help text says: Set when the album opens. It stays open for the duration included in your plan. Most couples open it on the morning of the wedding.
Need more album time?
Your album window is your album open date plus the number of days included in your plan: 7 days on Free, 30 on Starter, 90 on Plus and 180 on Complete. When the window ends we begin the process of permanently deleting the photos in the album — this may complete on the day itself or within a few days after, and deleted photos cannot be recovered.
If your window is coming to an end, you have two options:
Download the photos you want to keep.
Open the Gallery workspace in your studio and download photos from there — the stored versions are higher resolution than the previews shown in the guest gallery grid.
Upgrade your plan to extend the window.
Upgrading recalculates your window from your original album open date using the bigger plan’s duration. For example, an album opened 25 days ago on Starter (30 days) has 5 days left; upgrading to Complete (180 days) gives it 155 days from today. You can upgrade from your studio — open your event and choose Upgrade.
Moderating photos
With moderation on, the Photos tab gains filter tabs: All, Pending and Approved. New guest photos wait in Pending until you approve or reject them individually, and an Approve all pending button clears the queue in one go when everything looks fine. Rejected photos never appear on your page.
Getting guests into the album
The QR code that opens your page is downloadable from the studio, and a table card with that code is the reliable way to collect photos on the day. Guests point a phone camera at it, your page opens, and the upload button is right there. No app, no sign-up, no chasing people for pictures afterwards. See Go live and share your link for where to download it.
The gallery section on your page
How the album appears to guests is controlled on the page itself. Select the gallery section in the Content workspace and its inspector lets you choose how many photos show in the preview (4, 6, 8 or 12) and whether the upload button is visible. The photos themselves, and all the settings above, stay in the Gallery workspace.